Specify the supplier type, such as Import/Domestic.
Zumen Help Document
Table of Contents
2. Accept Registration Request from Buyer & Complete Zumen Signup (By Supplier) 16
3. Create Quotation (By Supplier) 21
Submit a basic price quotation, if required, for multiple parts 24
Submit a detailed quotation 25
Submit quotation by uploading a quotation file 31
6. Production Part Approval Process (PPAP) 44
7. Advance Shipment Notices (ASN) 50
8. Supplier accepting a revised rate 58
If the supplier includes a new raw material in the quotation 59
If the supplier uses an approved raw material in the quotation but with a different rate 61
8. Raw Material Supplier Actions 62
Accept a Raw Material Rate Change Agreement 62
Add new raw material in quotation that is not part of the buyer’s approved raw material list 63
Use an approved raw material in quotation, but at a different rate 65
Overview
This document provides detailed guidance for onboarding new suppliers into Zumen. The process involves capturing mandatory details, generating an onboarding link, supplier verification, and approval before integration with the ERP system.
Following this procedure ensures that supplier data is accurate, verified, and synchronized between Zumen and the ERP.
Step 1: Enter Mandatory Information
Before initiating the vendor onboarding process, you must fill in all mandatory details in the onboarding Supplier input form.
These details define the organizational and supplier classification and must be filled first:
Once the primary details are entered, fill in the basic vendor contact information:
After all mandatory details are filled, click “Submit” to proceed.
Step 2: Onboarding Link Generation and Vendor Approval
Once the information is submitted:
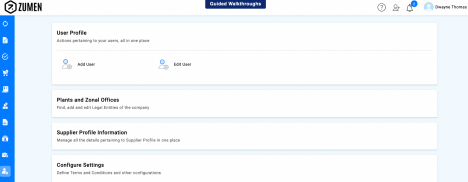
Step 3: Supplier Profile Completion
After successful login, the supplier needs to complete their profile information:
Step 4: Approval Workflow
Once the supplier submits the profile:
If the profile is sent back, the supplier will receive a notification with the required changes. After making the corrections, the supplier can re-submit the form for approval.
Step 5: Integration with ERP
Once the supplier profile is approved:
This guide will help a vendor register as a supplier with a buyer organisation. The registration process initiated by the vendor comprises the following steps:
1. Create an account in Zumen
2. Submit the vendor registration form
3. Approve the request (Buyer)
Note that if a buyer with whom you are not registered sends you a request for quote (RFQ), click ‘N’ in the Registered with the Buyer field in the RFQ, select the relevant buyer name, and complete and submit the vendor registration form. For instructions to complete the form, refer to step 2 above.
Create an Account in Zumen
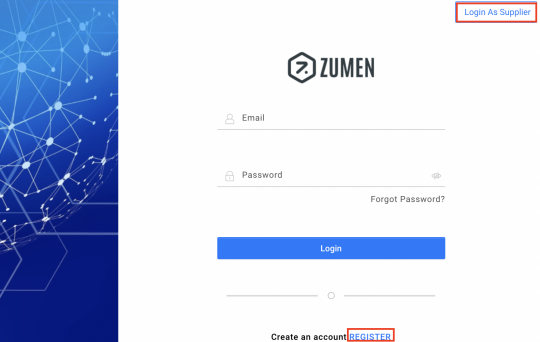
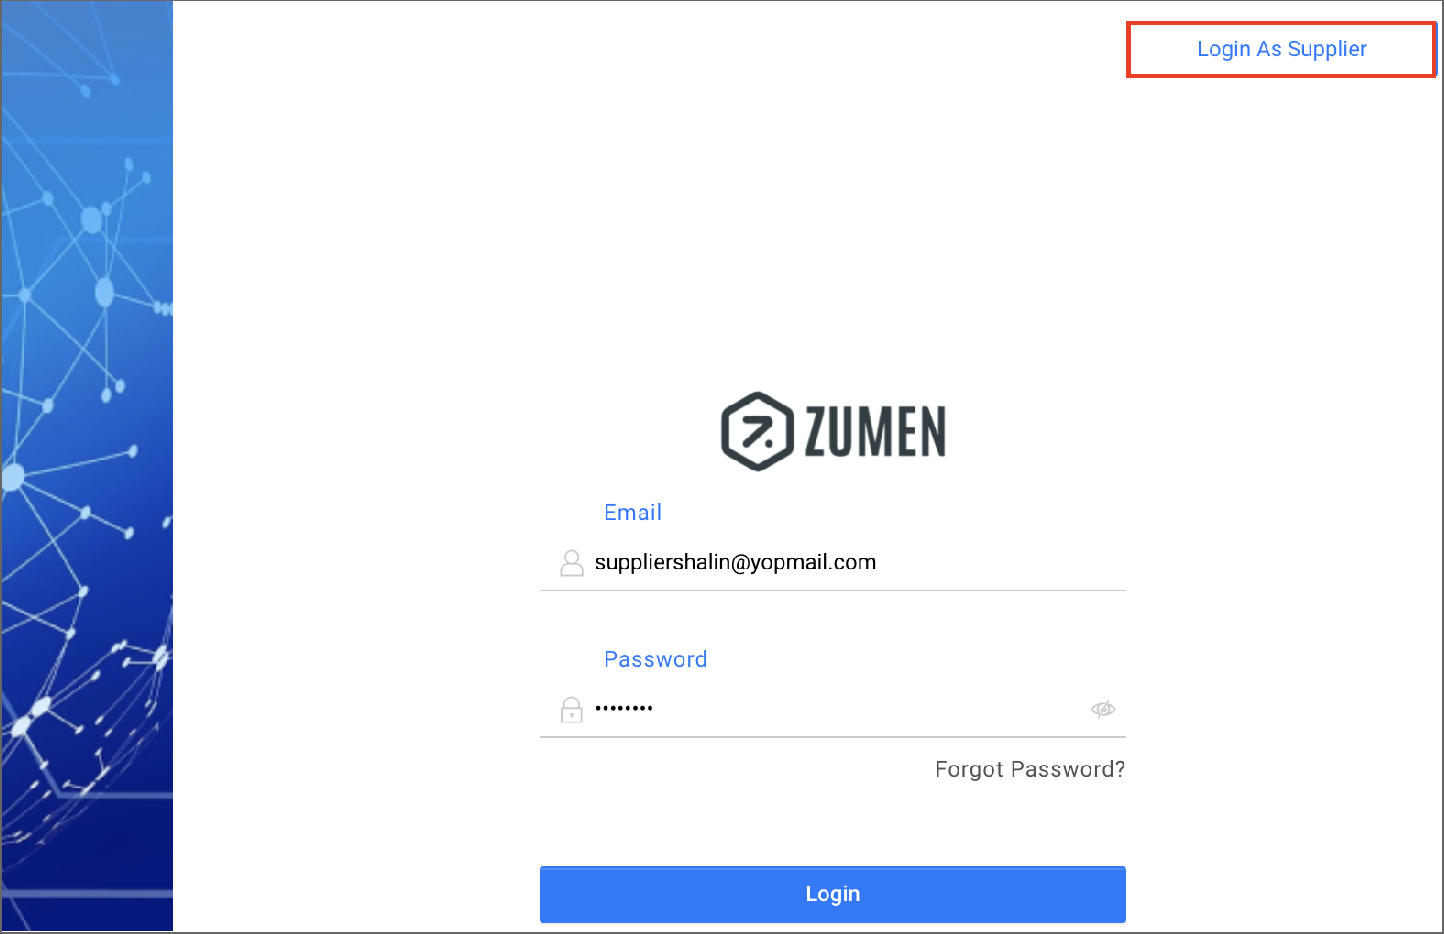
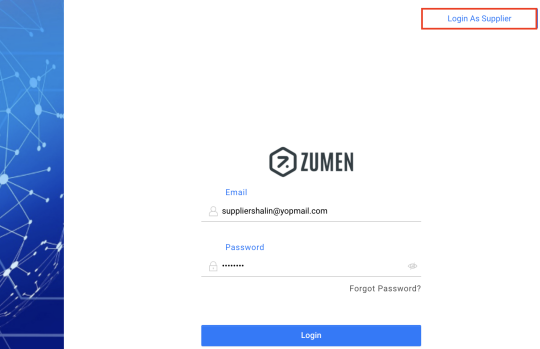
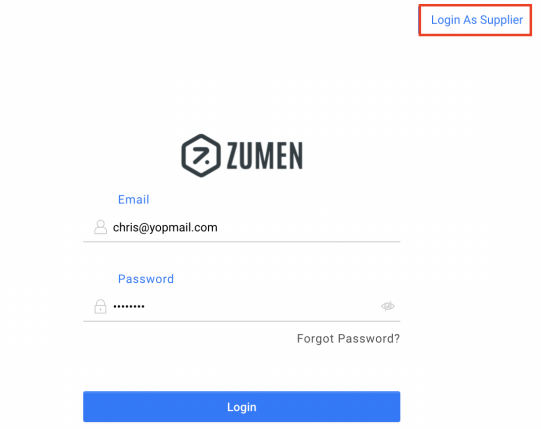
1. Type the Zumen URL in the address bar of a web browser. The Zumen Sign in page displays.
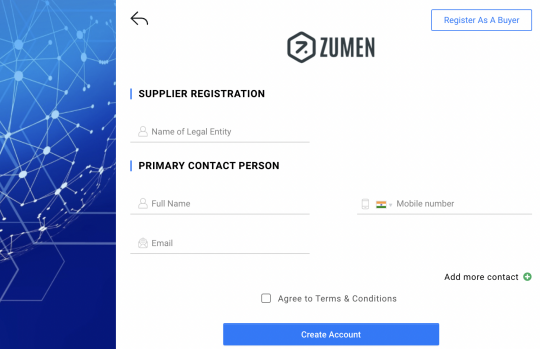
2. Click the Login as Supplier button and then the Register button. The Supplier Registration screen displays.
3. In the Name of Legal Entity field, enter the full name of the supplier company.
4. Then, enter the name, email address, and mobile number of the primary contact person from the supplier company. This person will be granted administrator access to Zumen.
5. Click the Add more contact link to add more contacts from the supplier company. Contacts added using this option will also be granted administrator access to Zumen.
6. Select the Agree to Terms & Conditions checkbox and click Create Account. The OTP and link to create password are sent to the primary contact’s and other contact’s email address entered in the previous screen.
7. Open the email and click the link in the email. A page opens.
8. Enter the OTP, create a new password for the account, and click the Create Account button. The supplier’s credentials are successfully created.
Submit the Vendor Registration Form
1. Type the Zumen URL in the address bar of a web browser. The Zumen Sign in page displays.
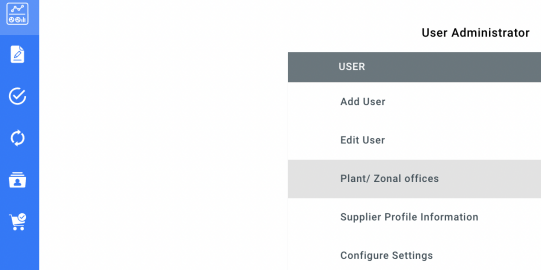
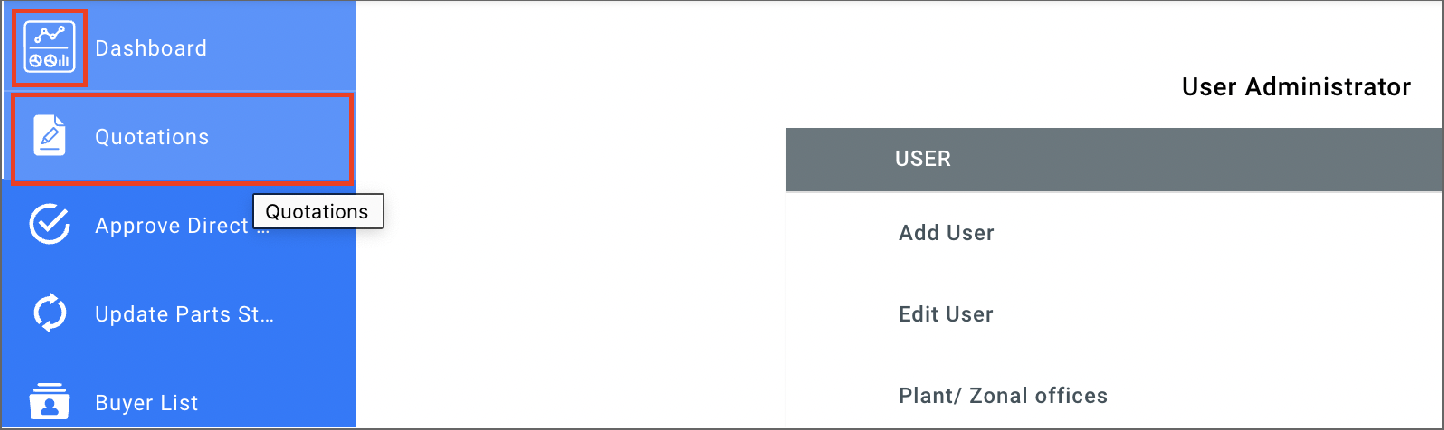
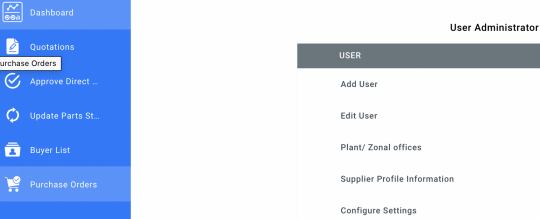
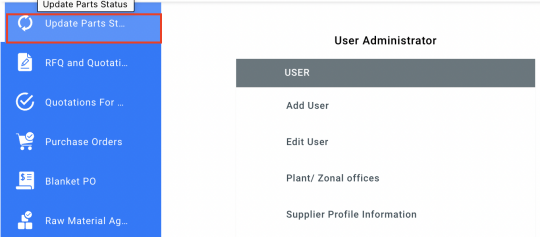
2. Click the Login as Supplier button, enter the email and password, and click Login. The User Administrator page displays.
3. Click the Plant/Zonal offices section. The Plant/Zonal Office screen displays.
4. Enter the address, location ID, and legal name of your company and click the Save button.
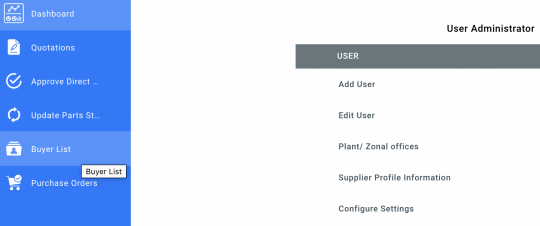
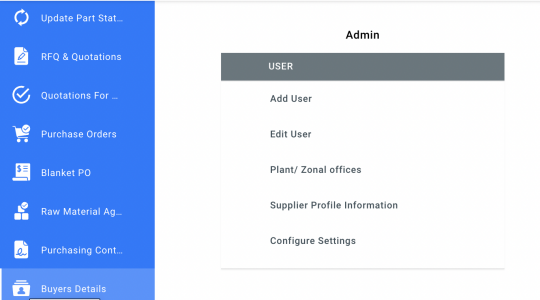
5. Hover over the Dashboard icon and click the Buyer List option.
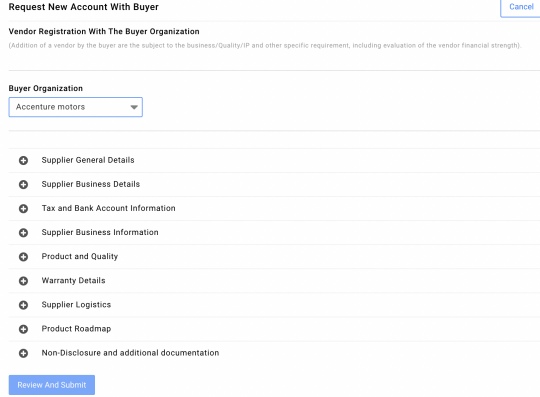
6. Click the Request New Account button. The Request New Account with Buyer screen displays.
7. Select the buyer company name from the Buyer Organization drop-down list. Entering three characters will pick up related results. The sections in the vendor registration form are displayed.
The fields that are mandatory in these sections can be configured in Admin. However, the fields that are mandatory in the first two sections, Supplier General Details and Supplier Business Details cannot be made non-mandatory.
8. Click the Add icon against a section to expand it.
9. Enter the required details as per the table below and click the Validate button at the end of each section to check if mandatory fields have been completed:
Field Description |
Supplier General Details
Company name Enter the full name of the legal entity. |
Global purchase code If this code is applicable in your country, enter the unique code that identifies your organization in your industry/country. |
Date of incorporation Enter the date the supplier company was established |
File/folio/corporate identification number Enter the company registration number |
Country/State/City/Zip code/Address Enter the address of the supplier company 1/Address 2 |
Nature of the business/Nature of the Select the relevant options in these fields and click the Upload company/Type of industry File link to attach any documents that you requested from the supplier. |
Management Details |
Title/Name/Mobile number/Email Enter the details of the contact person from the supplier’s address/Business address management team Click the Add Row link to add the details of another management team member. Supplier Business Details Name & Address of related Entities |
Legal name of the entity Enter the name of the supplier’s subsidiary company |
Address Enter the subsidiary’s address |
Business location corporate id no Enter the subsidiary’s registration number |
Business location GST/sales tax id number Enter the subsidiary’s GST or sales tax number |
Date of establishment Enter date of establishment of the subsidiary |
Supplier codes Enter a unique code for the supplier according to your organization’s numbering standard. |
Business location on leased or owned Select the relevant option based on whether the premises is premises leased or owned. |
Primary contact person for the Enter the name, designation, mobile number, and email address location/Designation of the primary of the primary contact person from the supplier company contact person/Mobile number of the primary contact person/Email address of the primary contact person |
Pictures of the facility If required, upload pictures of the supplier’s facility |
Business location gst/sales tax id type Enter the subsidiary’s GST or sales tax type. For example, CGST, Sales tax, Use tax, or VAT rate. Click the Add Row link to add the details of another subsidiary. |
Name & Address of Business Contacts |
Contact person Enter details of other contact persons from the subsidiary name/Designation/Address/Telephone number/Mobile number/Email id Click the Add Row link to add the details of another contact person. |
Tax and Bank Account Information |
Tax IDs |
Federal/central tax identification number For US companies, enter the employer identification number (tin) (EIN), which is a federal tax identification number used to identify a business entity Income tax registration (permanent For Indian companies, enter the permanent account number account) number (PAN) of the business entity. |
Excise number Enter the excise number of the business entity Excise reg date Enter the date the business entity was registered by the appropriate authority |
Federal/central sales tax id number Enter the sales tax number (For US companies) |
Sales tax registration date Enter the sales tax registration date (For US companies) |
Gst arn (application reference) number Enter the application number if your company has just submitted the GST application (For Indian companies) |
Gst provisional id number Enter the provisional number if your company is yet to complete the GST registration process (For Indian companies) |
Gst final id number Enter the GST number (For Indian companies) Click the Add Another Tax ID link if you want to add tax IDs for another business entity. |
Supplier Bank Details |
Bank name/Branch address/Account Enter the supplier’s bank name, address, account number, and number/Beneficiary name account holder name. |
Ifsc code Enter the IFSC code (Indian Financial System Code). The IFSC code is a 11-digit code that identifies individual bank branches in India. This code makes it possible for banks to transfer |
money to and from your accounts. |
Aba routing number Enter the ABA (American Bankers Association) number. The ABA number, also known as a bank routing number, is a nine-digit code that identifies banks in the U.S. This number makes it possible for banks to transfer money to and from your accounts. |
Swift code Enter the SWIFT code (Society for Worldwide Interbank Financial Telecommunications). A SWIFT code is used to identify a particular branch of a bank. These codes play an important role in various bank transactions, especially when it comes to international transactions. A SWIFT code may also be used by various banks to transfer other messages. |
Iban number Enter the IBAN number (International bank account number) IBAN is a standard international numbering system for individual bank accounts around the world. Type of account Enter the type of account. For example, current or checking. |
If applicable for international wire Select the checkbox if you want to enter bank details for international payments |
Correspondent/intermediary bank for Enter the correspondent/intermediary bank name and address international wire; Correspondent/intermediary bank Correspondent or intermediary banks serve as third-party banks address for international wire and are used by beneficiary banks to facilitate international fund transfers and transaction settlements. Payments will reach the intermediary bank before being credited to the beneficiary, which is the final destination for the transfer. |
Beneficiary name for international wire; Enter the beneficiary bank name and address Beneficiary address for international wire; |
Special instructions for international wire Enter special instructions that should be included by the buyer while effecting a international wire transfer |
Supplier Business Information |
Major Business Partners |
Major suppliers Enter the names of the supplier’s main suppliers. Use a comma to separate the names. |
Major customers Enter names of the supplier’s main buyers. Use a comma to |
separate the names. |
Supplier Business Details Enter details about the supplier’s total financials for a year. Click the Add Row link to add the financials for another year. |
Personnel Details Enter the number of staff in the supplier’s company in each category such as management, admin, and operations. |
Product and Quality |
Enter details about the supplier’s product, production and quality equipments, and certifications |
Warranty Details |
Enter details about the warranty policy provided by the supplier |
Supplier Logistics |
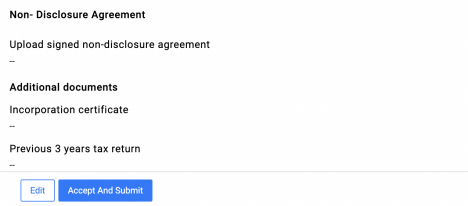
Enter details about how the supplier manages logistics Product roadmap Attach the supplier’s short-term, mid-term, or long-term product plan. Non-Disclosure and additional documentation |
Upload the non-disclosure agreement (NDA) or confidentiality agreement signed by both the buyer and the supplier. This is a legally binding contract where the parties signing the agreement agree that sensitive information that may be shared will not be made available to others. |
10. Click the Review And Submit button. The registration form displays in preview mode. 11. Review the details entered.
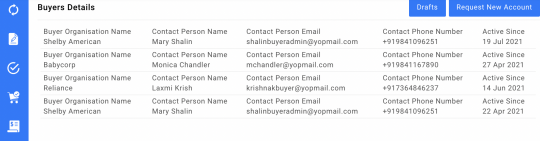
12. If you want to submit the form later, click the Save As Draft And Close button. TTo access the draft later, hover over the Dashboard icon, click the Buyer List option and then click the Drafts button. To edit the draft, select the checkbox against the relevant row and click the Open button.
13. To proceed with submitting the form, click the Submit button. The request is routed to a designated approver in the buyer organization.
14. Once the buyer organization approves the request, you will receive an email notification that the vendor registration request has been approved.
To confirm the registration, go to Dashboard > Buyer Details and view the approval date in the Active Since column.
Video reference: 9. Vendor Registration (Supplier)
Complete the following steps once you receive confirmation from your buyer that they have submitted the registration request:
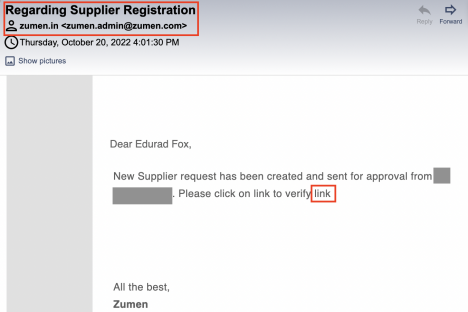
1. Go to your email inbox.
Note: Ensure you access the email that is on your buyer organization’s records. If you have provided more than one email ID, once a user from your company completes the registration process, the signup email will be sent to all the email IDs on record.
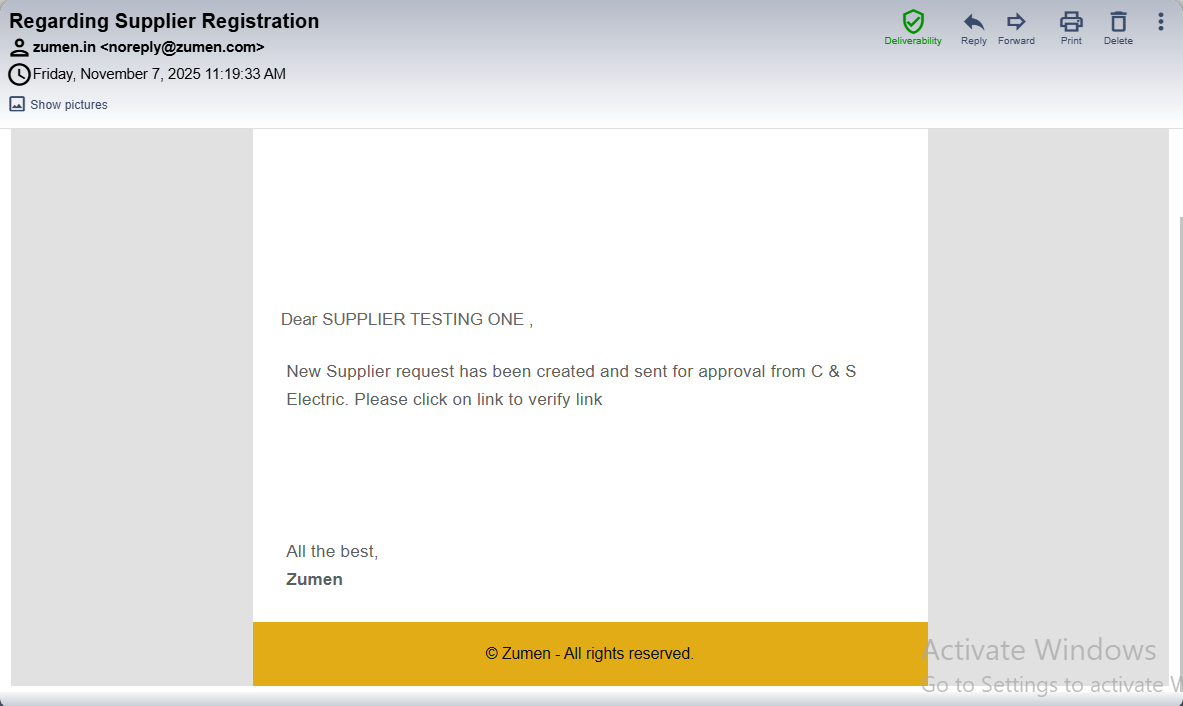
2. Open the email from ‘zumen.in’ with the subject line ‘Regarding Supplier Registration’, and click the link.
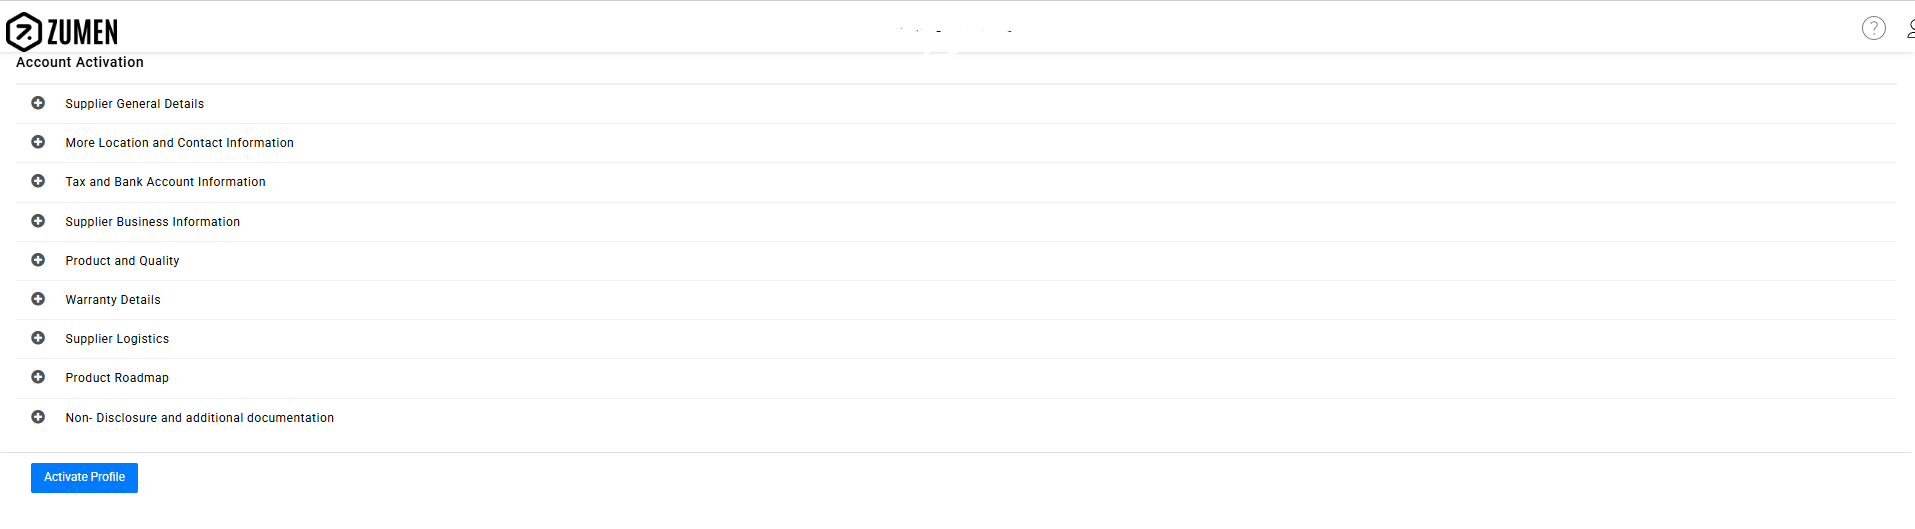
3. The Account Activation page is displayed in Zumen.
4. Verify your company details that have been entered by the buyer organization and click the Accept And Submit button at the bottom of the page.
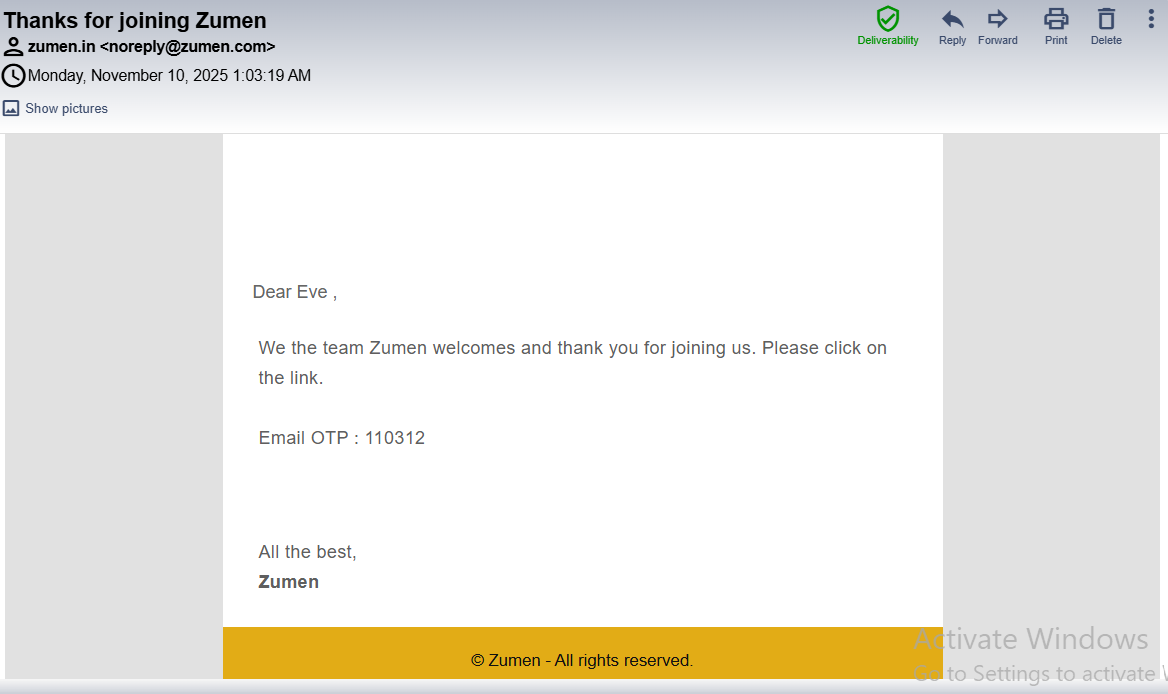
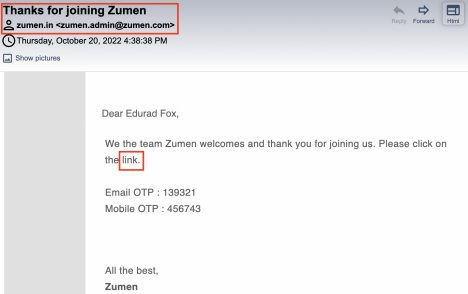
With this, your registration process is complete and you will receive another email from ‘zumen.in’ with the subject line ‘Thanks for joining Zumen’.
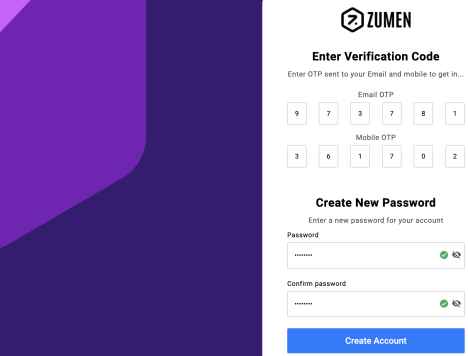
5. Click the link in the email. The new password creation page is displayed in Zumen.
6. Enter the OTPs that you received in the email, create your password for Zumen, and click Create Account.
Note: Password should be minimum 8 characters long with one special character, number, lower and upper case letter.
With this, your signup process is complete.
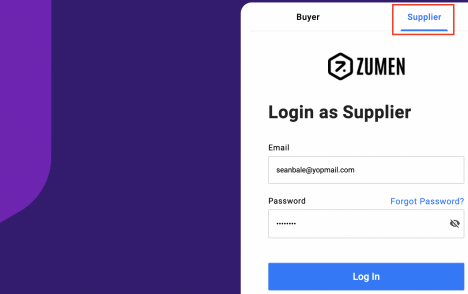
7. To sign in to Zumen, type motorad.zumen.com in your browser. The Zumen sign in page is displayed.
8. Click the Supplier tab.
9. Enter your email ID. This will be your Zumen user ID.
10. Enter the password that you just created and click Log In. The Zumen home page is displayed.
Prerequisites
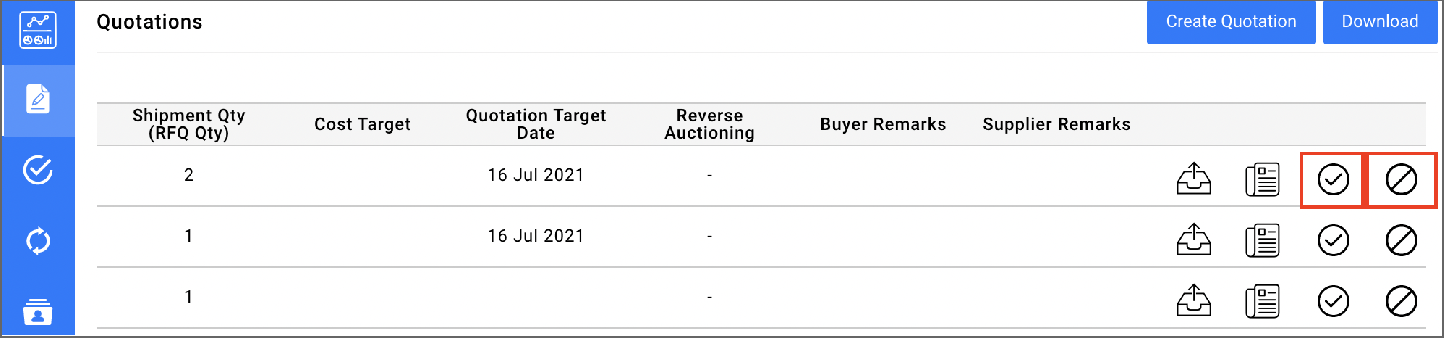
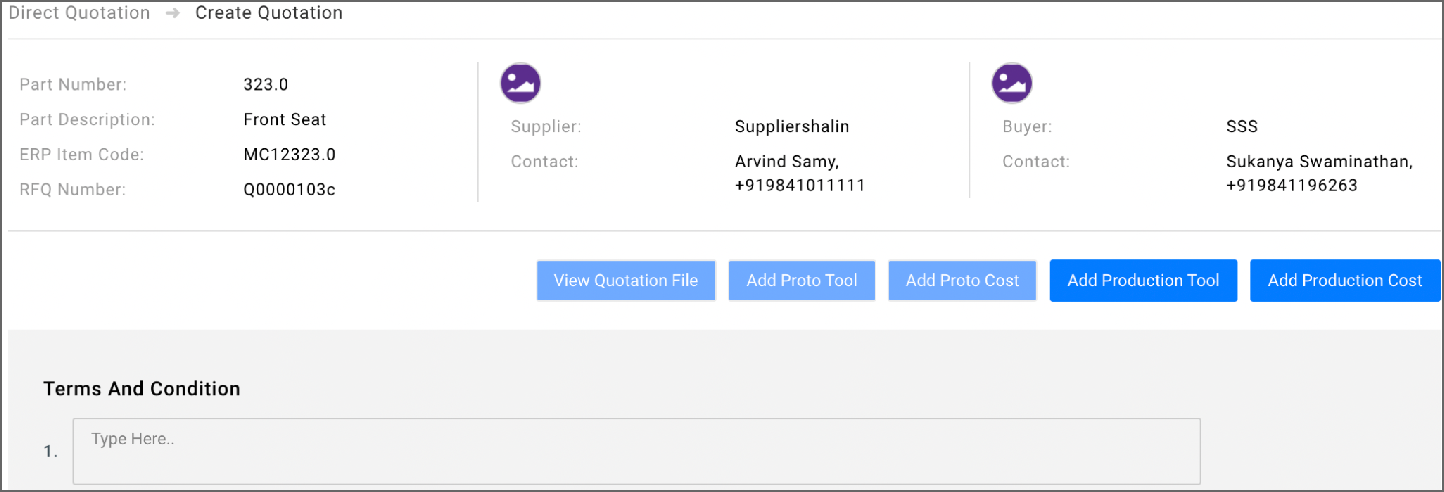
This guide will help you create and submit a quotation to the buyer.
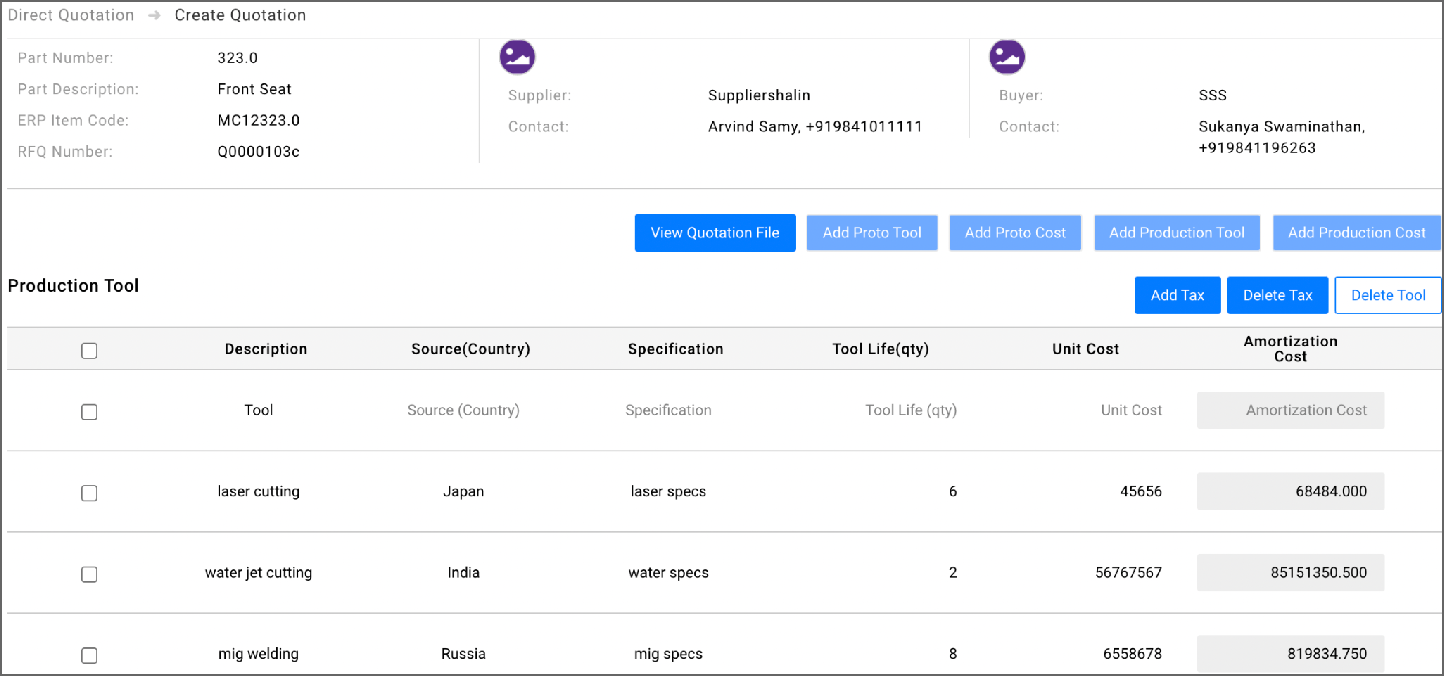
the Accept icon against the part.
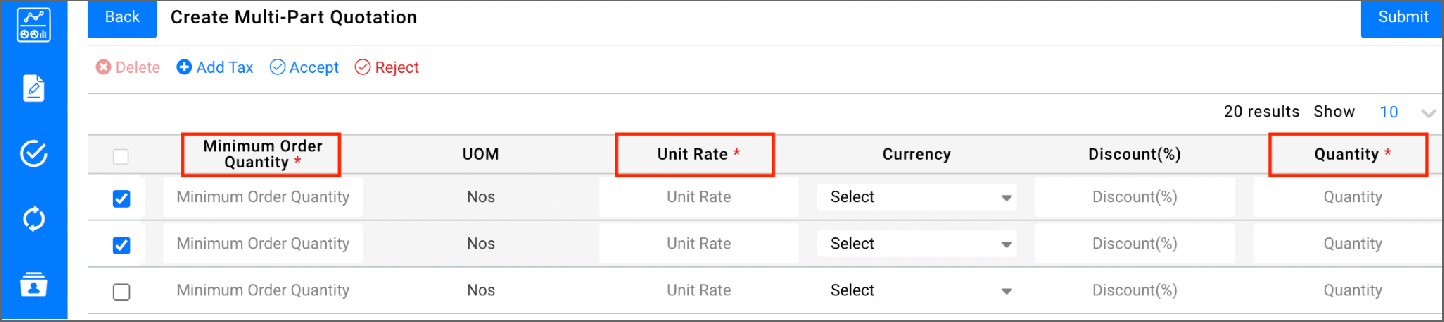
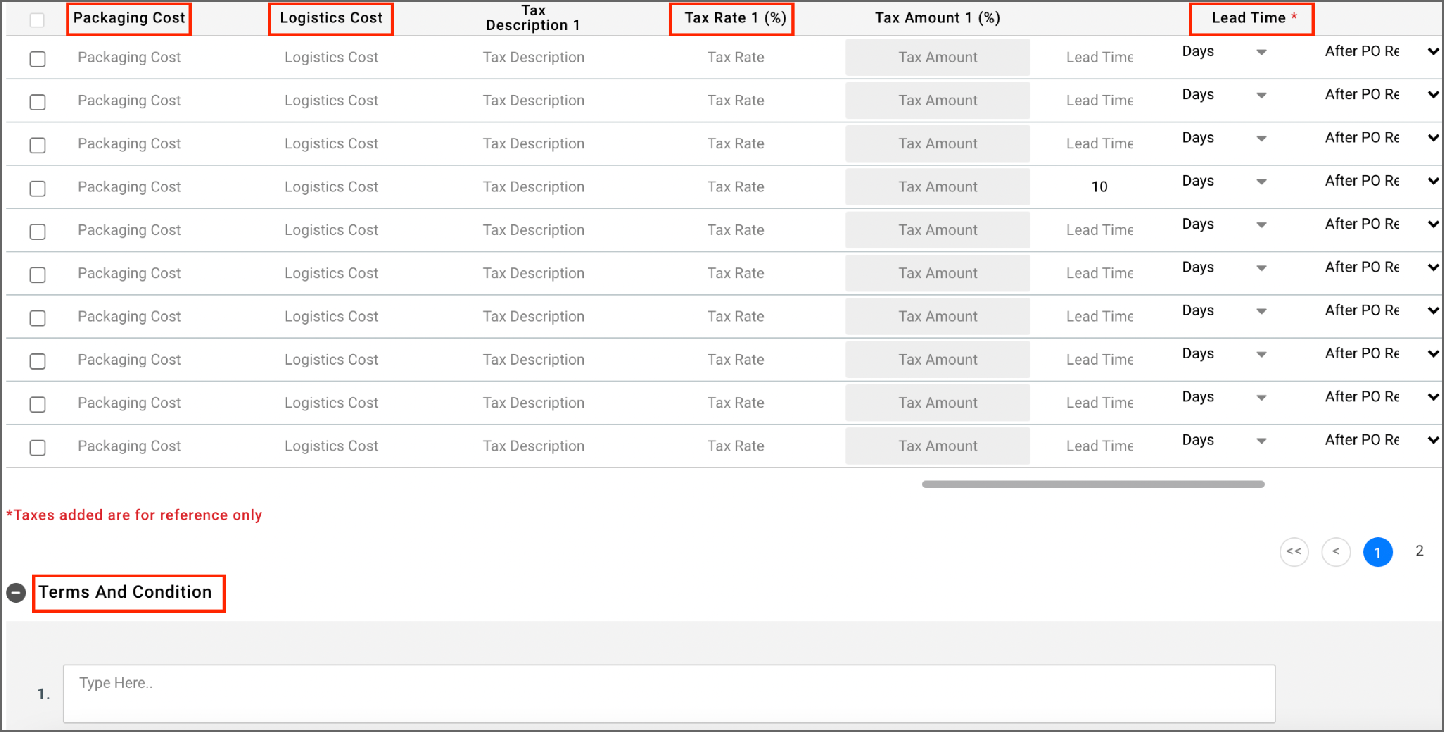
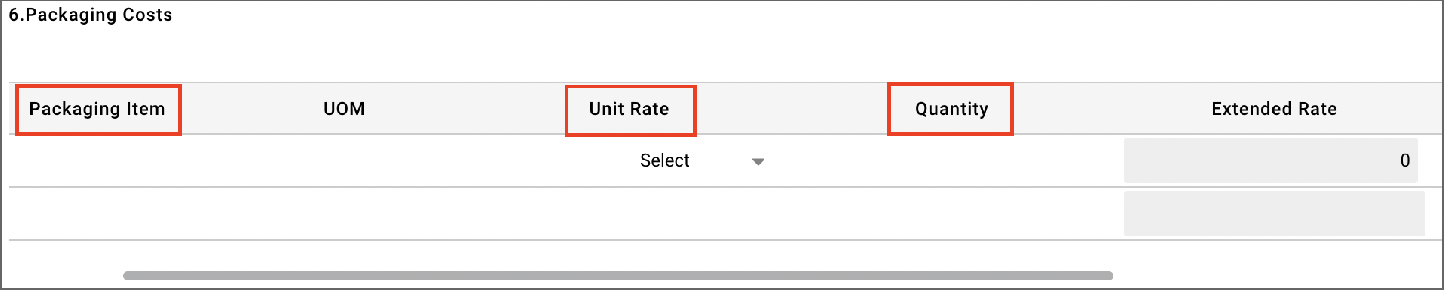
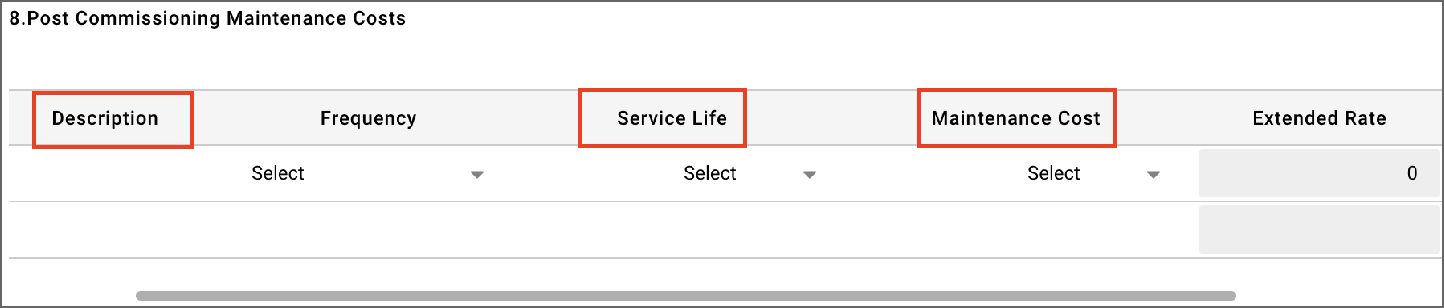
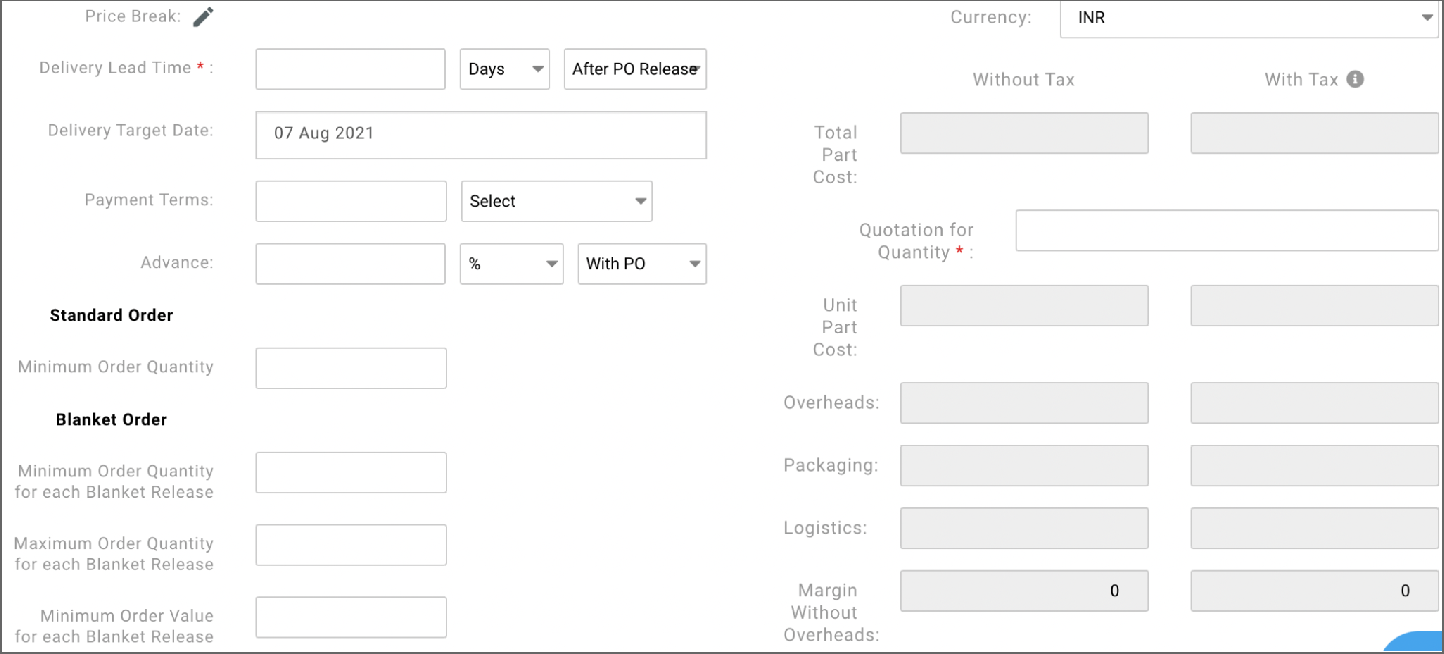
Enter details in the tables based on the level of breakup you’d like to provide for the overall part cost. It is not mandatory to enter details in all the tables.
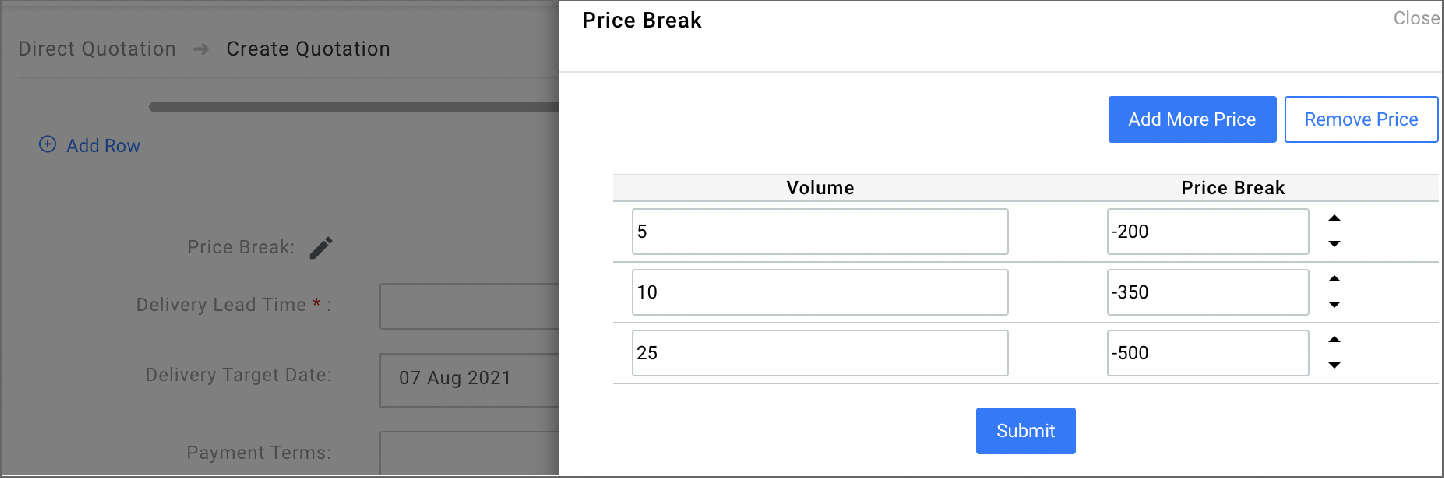
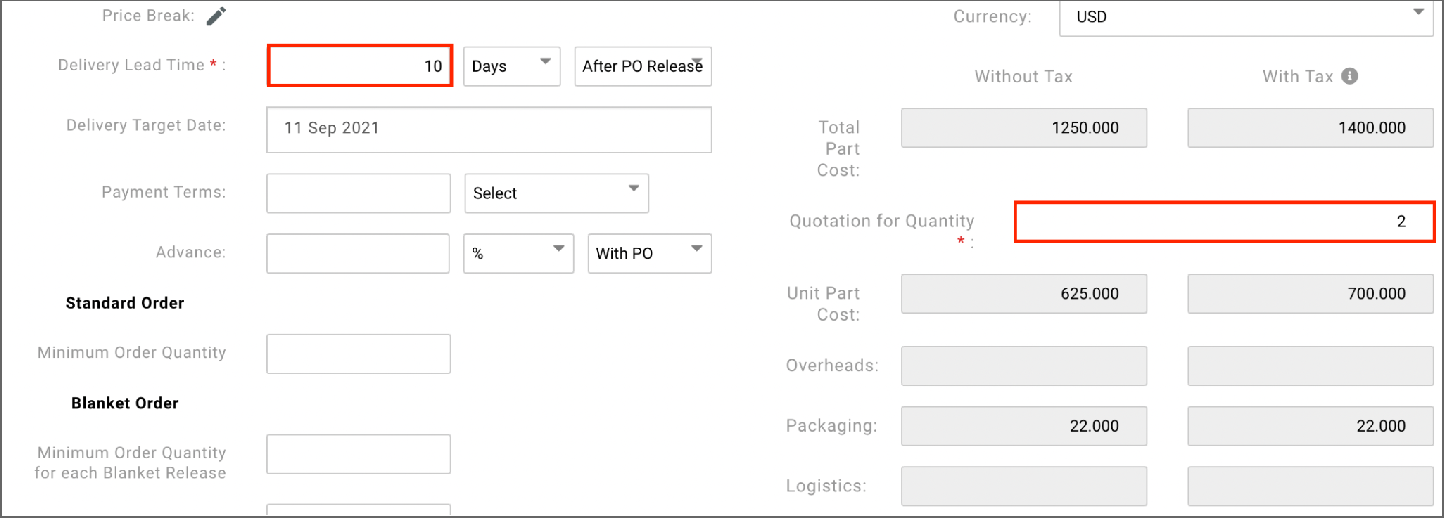
icon to enter the volume of units and the reduction amount in unit price.
This is what the below price break table means:
For example, if the order is for 30 units and unit price is 3000, the price break calculation will be as follows:
Payment Terms fields.
If the buyer requirement is for quantity y, the extended cost will be unit cost * y.
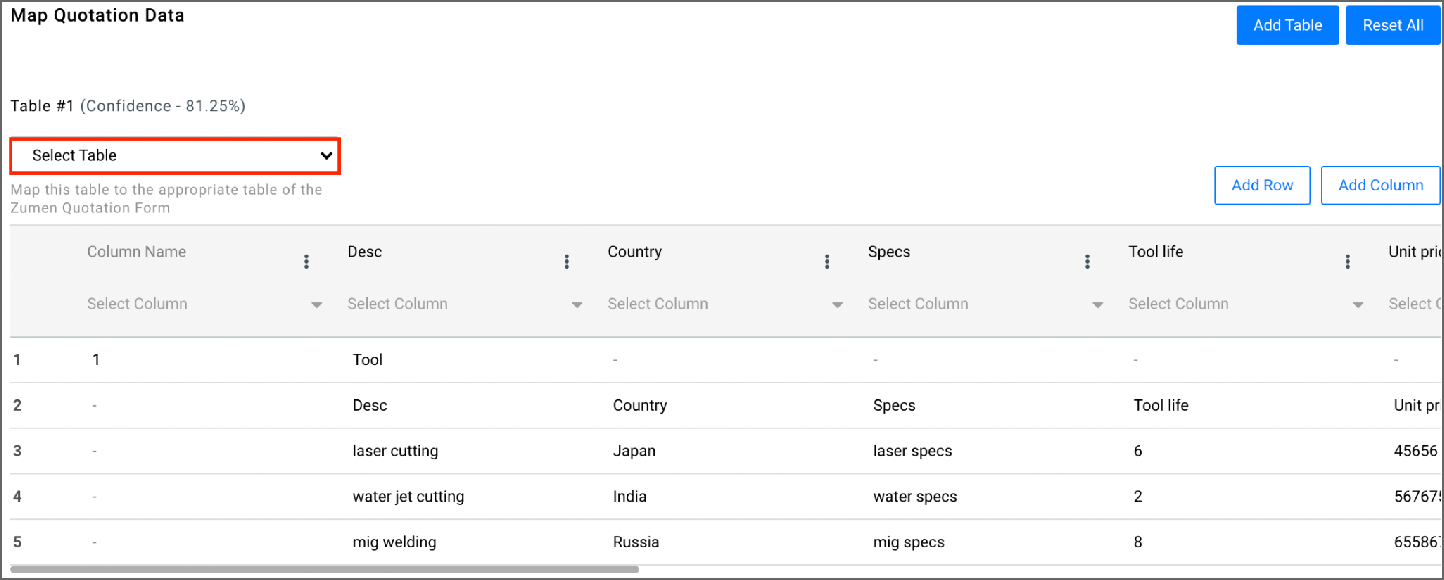
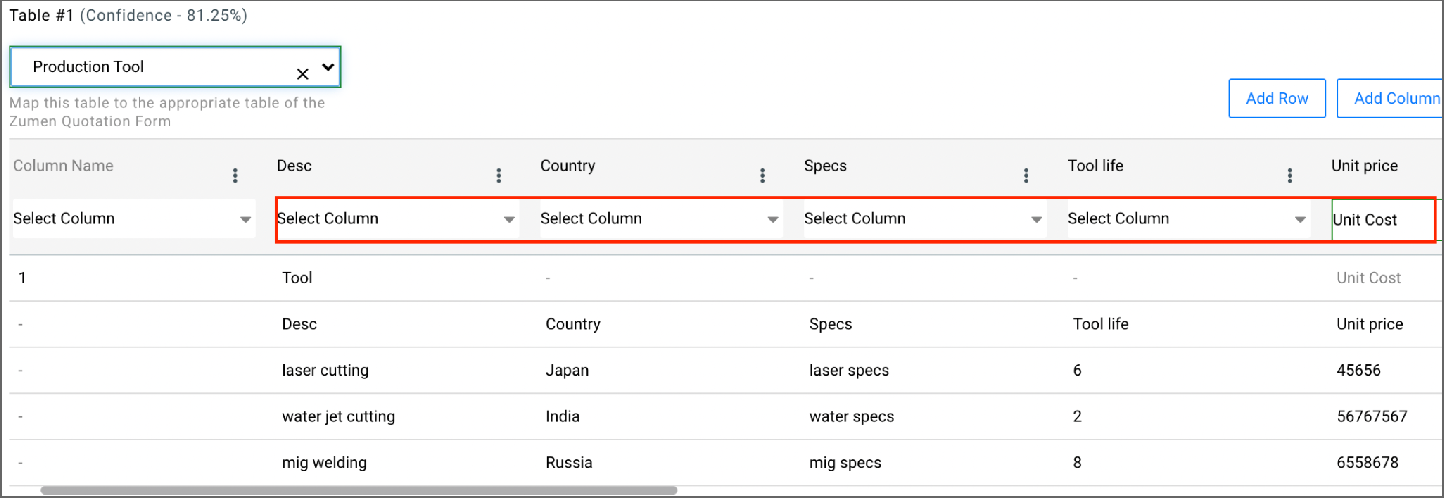
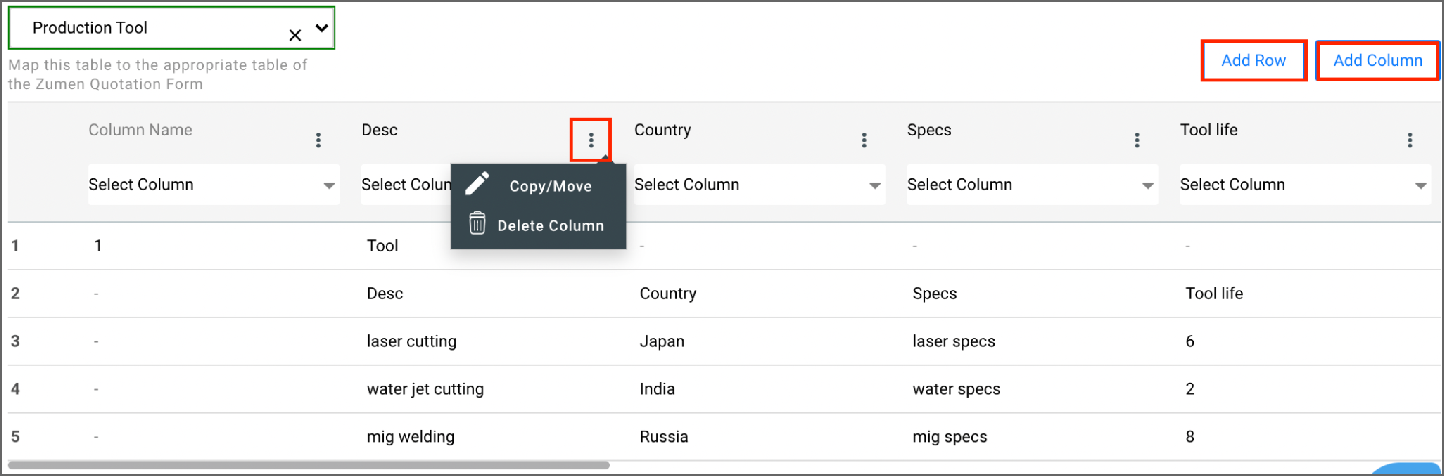
For columns where the column name is not auto-populated, select the relevant option from the Select Column dropdown list. In the above snapshot, the name of the first column from the quotation file is ‘Desc’. This needs to be mapped to the correct column name in Zumen, which is ‘Description’.
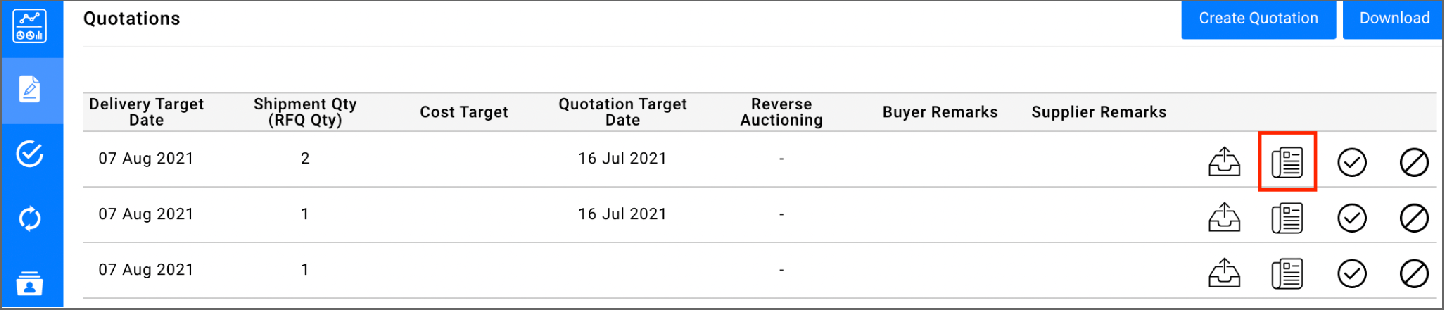
You can also edit a quotation after you have submitted it, if the buyer requests a more detailed quotation or
better pricing. To edit a submitted quotation, go to the Quotations home page and click the Edit icon against the part.
Once you modify and submit the quotation, the buyer can take action only on the latest quotation.
Video reference: 6. Create a Multi-Part Quotation (Supplier); 7. Submit Detailed Quotation (Supplier)
Prerequisite
● A purchase order (PO) should have been routed to you for acceptance.
This guide will help you accept a PO.
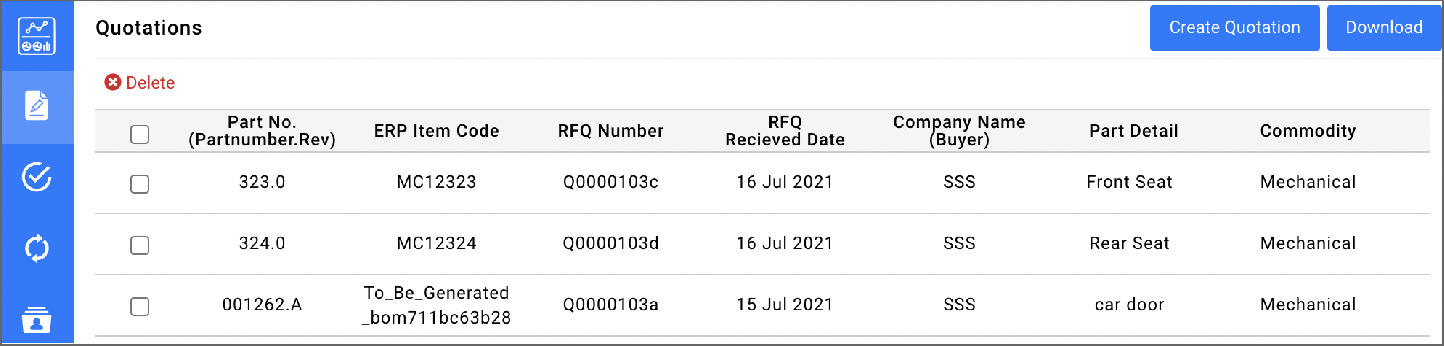
1. Click the Login As Supplier button.
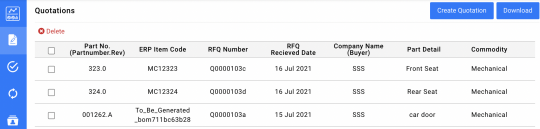
2. Enter your credentials. The Quotations page displays.
3. If you are an admin user, the User Administrator dashboard displays.
4. Hover over the Dashboard icon . A list of options are displayed.
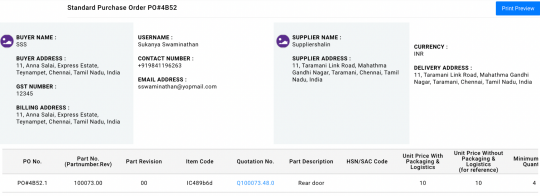
5. Click the Purchase Orders option. POs that has been sent to you by the buyer is displayed. 6. You can view only the POs pending your acceptance by setting up a filter by status, Pending Action.
7. Click anywhere on the relevant row. The PO displays. Review the details in the PO such as unit price, quantity, lead time, delivery address, payment terms, and other terms and conditions, if specified, in the PO.
8. If the information in the PO is not as per the quotation and negotiation with the buyer, click the Reject button. A notification is sent to the buyer.
9. If the information in the PO is as per the quotation and negotiation with the buyer, click the Accept button. A notification is sent to the buyer.
To keep the buyer informed about the part development and delivery status, update the required details in Dashboard >> Update Parts Status.
Video reference: 17. Supplier Accepting a PO
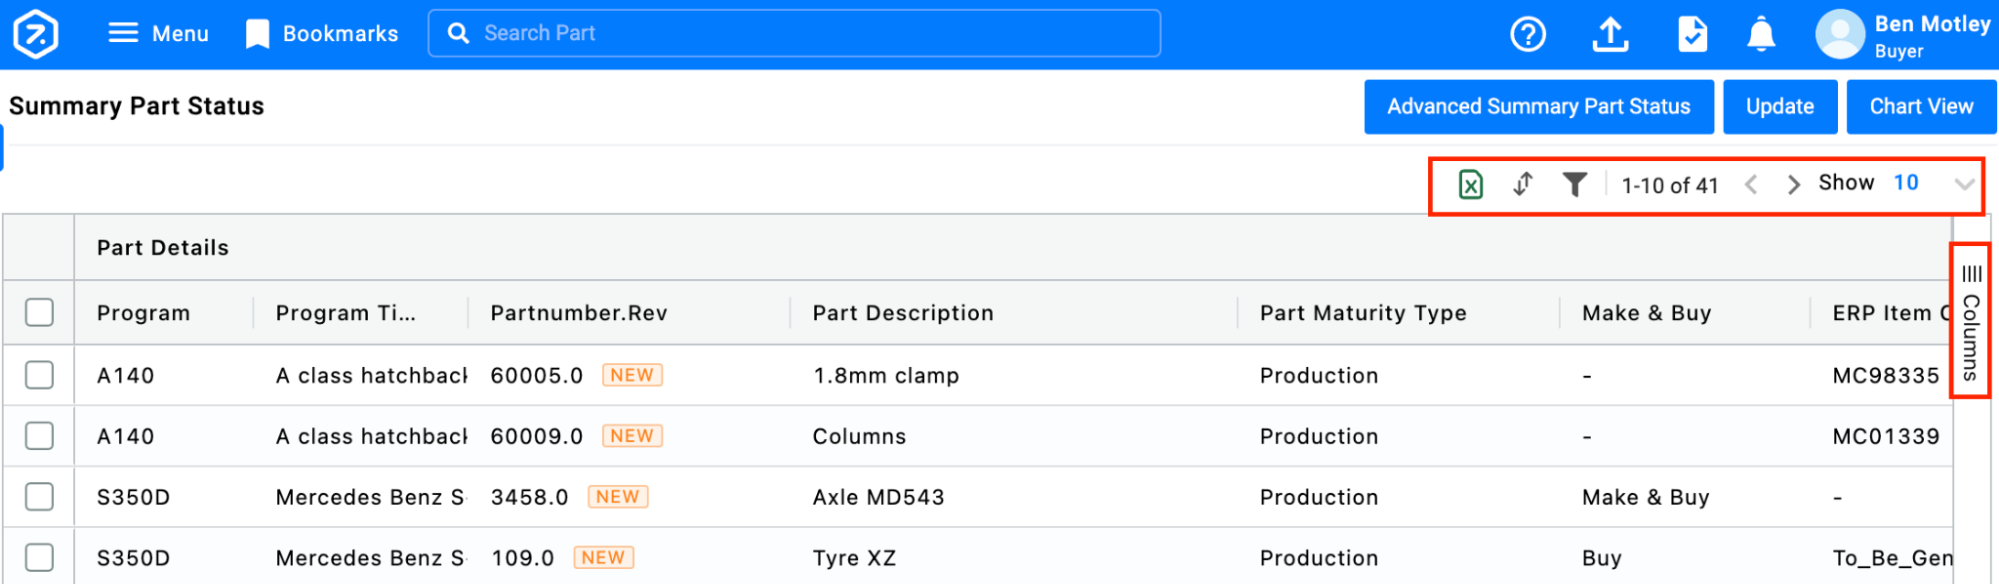
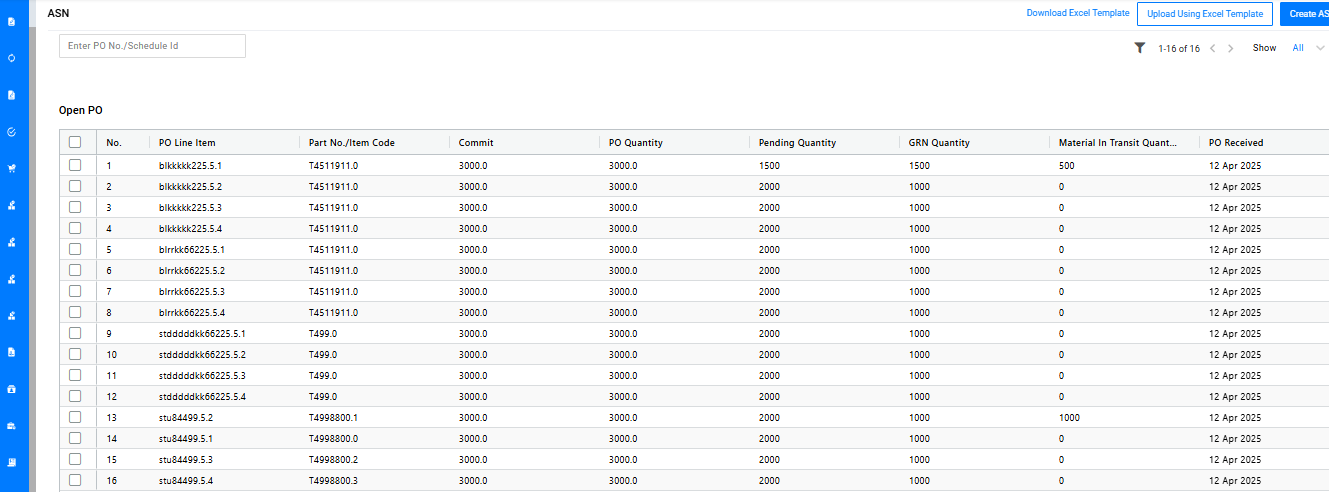
You can review the details of all parts in the organization for which a PO has been released to the supplier.
Additionally, you can review the following data in this screen:
To help you analyze the data better, you have the following options:
Actions that can be performed from this page are:
Note: Manual entry of GR details applies only to companies that do not have an ERP or WMS system. For companies whose ERP or WMS systems are integrated with Zumen, the GR data is automatically populated here from those systems. For companies whose ERP or WMS systems are not integrated with Zumen, the GR data can be downloaded from those systems and uploaded into the inventory in Zumen. With the inventory upload, the GR details are automatically populated here.
Review the description or action required for columns that display on this screen:
Column | Description/Action |
Part Details | |
Program | Displays the Program code |
Program Title | Displays the name of the program |
Partnumber.Rev | Displays the part number in the following format: <Part number.Revision> |
Part Description | Displays a brief description of the part |
Part Maturity Type | Indicates the maturity of the part in relation to the product life cycle. Example: Proto or Production. |
Make & Buy |
|
ERP Item Code | Displays the unique code for the part in the ERP system |
Part Catalogue Number | ID used in your parts catalog when selling the part. More than one part may be assigned to one part catalog number. |
OE Reference | ID for the part in the original manufacturers' parts catalog. More than one OE ID may be available for the same part. |
UOM | Displays the unit of measure (Example: Lb, Kg) |
Component Type/Category; Material; Coating; Weight; Net Quantity | Raw material details entered by the design team in the bill of material (BOM). For example, whether the part is a fabrication or a machining part. |
Designer | Displays the name of the designer from the BOM |
Part Created Date | Displays the date the part was created in Zumen |
Part Created By | Displays the name of the user who created the part |
Part Status | Displays the status of part creation |
RFP Details | |
RFP Date | Displays the date the request for purchase (RFP) was initiated |
RFP Quantity | Displays the number of units to be purchased in the RFP |
Stock | Displays the total number of units of the part currently available in the warehouse |
RFQ Details | |
Buyer | Displays the name of the user who was assigned to purchase the part |
Cost Target | Maximum limit for part cost specified by buyer organization in the RFQ |
Quotation Date | Displays the date the quotation was received from the supplier |
Supplier Name | Displays the supplier name |
ERP Supplier Code | Displays the supplier code maintained in your ERP |
Supplier Part Number | Displays the part number that the supplier company maintains for the part |
External OE Part Number | Displays the part number that the original equipment manufacturer (OEM) maintains for the part Note: An OEM is a company that manufactures components which are used by other companies in their finished product. |
Purchase Order Details | |
Purchase Order Date | Displays the date the purchase order (PO) was created |
PO Number | Displays the PO number |
ERP PO Number | Displays the PO number in the ERP system, if applicable |
PO Released Date | Displays the date the PO was released to the supplier after the final approval |
Delivery Target Date | Displays the delivery date specified by the buyer in the PO |
Delivery Lead Time (In Days) | Displays the time required by the supplier to deliver the parts |
Supplier Acknowledgement & Quality info details | |
Supplier Acknowledgement | Displays ‘Pending’ or ‘Approved’ based on whether the supplier has accepted the PO or not |
Program Delivery Target Date | Displays the target completion date specified in the program by the project team |
Completion (Approx.Estimate) | Displays the percentage of work completed and updated by the supplier |
Quality Audit/ PPAP Date | Displays the date entered by the supplier on the Update Part Status page. The supplier enters the date by which they will be ready for the quality audit. |
PPAP/ Quality Inspection Report | Click the link to review and approve the PPAP documents submitted by the supplier. For instructions, refer to Buyer taking action on submitted PPAP documents. |
SCM Owner | Enter the name of the user who will be the person-in-charge of the supply-chain activities |
Material Status | |
PO Status | Displays the status of the PO, such as approved or on hold. |
Material Receipt | |
Shipment Control | |
Delivery Location | Displays the location to which the finished items are sent |
Location ID | A unique ID is assigned to each delivery location during setup |
Delivery Quantity | Total quantity of units in the shipment |
Actual Partial Shipment details | |
Partial Shipment | Displays the delivery address of the partial shipment |
Partial Shipment Quantity | Displays the quantity of the partial shipment |
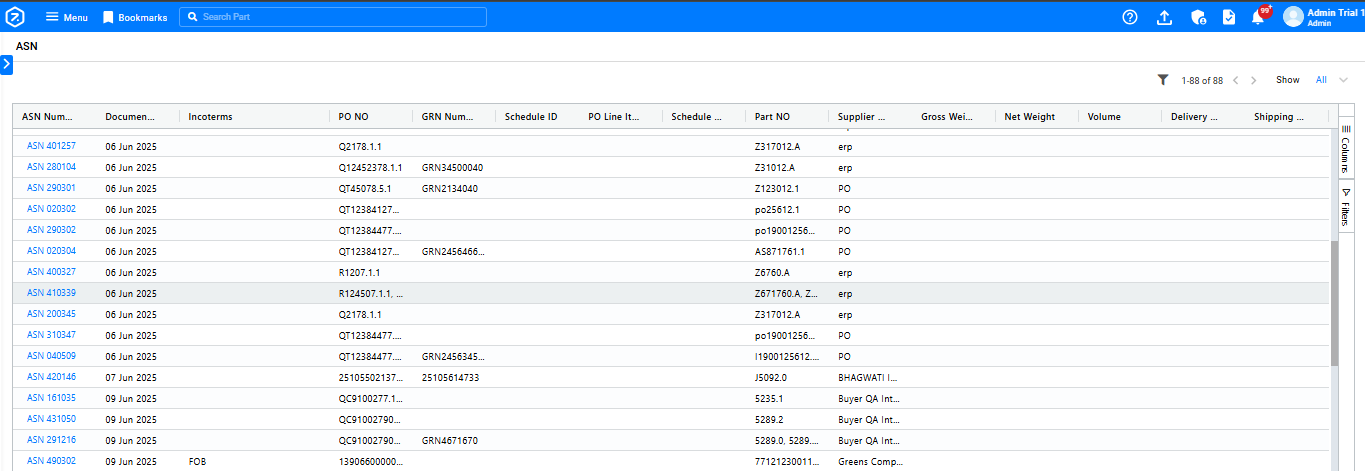
ASN Number | An e-document or an ID that a supplier sends to the warehouse informing an upcoming goods delivery (Advance Shipment Notice) |
GRN Number | A record that confirms the receiving of goods at the warehouse (Goods Received Note) |
Packaging Info | |
No. Of Packaging Units; Unit; Weight Unit; Weight/Packaging Unit; Total weight of shipment; Dimensions | Packaging details entered by the supplier’s logistics team or the supplier’s freight forwarder |
Freight Forwarder Info | |
Shipper Name; Shipper Ref No; Shipment Mode; Vessel Name; Ship From; Destination; Status; Container Load Category; Port; BOL# / AWB#; Booking Date; HBL/AWB No; Ready Date by Shipper; ETD; ETA Port/Airport; ETA Final Destination; Shipment received Date; Remarks | Shipping details entered by the supplier’s logistics team or the supplier’s freight forwarder |
Shipment Dispatch Details | |
Target Dispatch Date | Displays the target dispatch date updated by the supplier on the Update Part Status page |
Actual Dispatch Date | Displays the actual dispatch date updated by the supplier on the Update Part Status page |
GRN/Parts Receipt Date | Displays the GR posting date for the received parts |
Parts Received | Displays the quantity for which the GR is posted |
Parts Accepted | Displays the number of parts accepted as a result of the incoming inspection |
PO Quantity | Displays the quantity listed in the PO for the part |
Quantity Shipped by Supplier | Displays the number of units of the part shipped and updated by the supplier on the Update Part Status page. |
Balance Quantity | Displays the pending number of units that the supplier is yet to deliver |
Payment & Invoice Details | |
Unit Rate | Displays the PO rate of each unit of the part |
Value of Balance (PO Currency) | Displays Balance Quantity * Unit Rate in PO currency |
Value of Balance (Base Currency) | Balance Quantity * Unit Rate Displays only if base currency is different from PO currency, that is, organizational currency set in Admin (Plant & Zonal offices) |
Payment Reference | Displays the payment document number |
Payment Date | Displays the invoice posting date |
Invoice Number | Displays the invoice number |
Invoice Date | Displays the invoice date |
Comments & Attachments | |
Pictures | Click the thumbnail, if any, to view pictures submitted by supplier on the Update Part Status screen |
Proforma Invoice | Click the thumbnail, if any, to view proforma invoice attached by supplier on the Update Part Status screen |
Material Inward (Gate Stamp) | Click the thumbnail, if any, to view gate pass attached by supplier on the Update Part Status screen |
Final Invoice | Click the thumbnail, if any, to view final invoice attached by supplier on the Update Part Status screen |
Other Documents | Click the thumbnail, if any, to view supporting documents such as material report or supplier inspection report submitted by supplier on the Update Part Status page |
Comments | Displays comments entered by the supplier on the Update Part Status page |
Distribution Details | |
Warehouse Location | Displays the warehouse's address |
Warehouse ID / Rack & Bin | Displays the assigned unique warehouse ID or the Rack/Bin number |
Planned Quantity | Total planned quantity of the shipment to the warehouse |
Quantity Shipped | The total number of units shipped to the warehouse |
Actual Quantity | |
GRN Number | A record that confirms the receiving of goods at the warehouse (Goods Received Note) |
Number of Partial Shipment | If the supplier has updated partial shipment details, click the arrow mark iconto display the rows for each shipment batch. The number against the arrow mark icon displays the number of hidden rows. |
Shipment Number | Shipment nu mber entered by the supplier |
PO Line Status | |
GRN Number | Enter the GR document number |
Review Details | Click this button to view the part history & RFQ and quotation details. |
Incoming Inspection | Click this button to:
For more details, refer to the Incoming Inspection Process. |
Request Update | |
Video reference: 18. Part Development Update & Quality Inspection
The production part approval process (PPAP) process entails the supplier submitting certain documents based on the buyer’s request. The buyer’s approval of the documents establishes that the supplier has met the buyer’s quality requirements and that the supplier’s process is capable of consistently producing quality parts. In short, PPAP can be defined as an agreement on quality between the buyer and supplier on a new or even a regular production part.
Prerequisite
The purchase order (PO) for the part should have been accepted by the supplier.
This guide covers the process the buyer’s quality team and the supplier need to follow to complete PPAP in Zumen. There are two steps in this process:
a. Supplier submitting the PPAP documents
b. Buyer taking action on the submitted documents
Supplier submitting the PPAP documents
1. Log into Zumen by clicking Login As Supplier and entering your credentials.
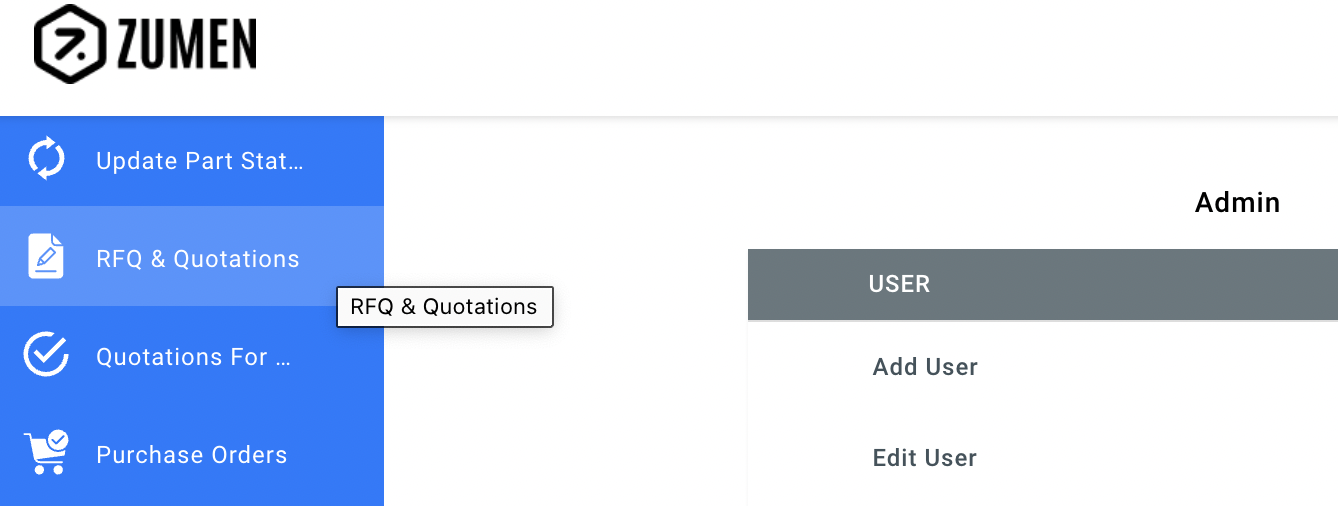
2. Hover over the left-navigation menu and select Update Parts Status.
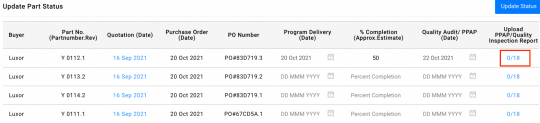
3. Go to the row for the relevant part and click the link in the Upload PPAP/Quality Inspection Report column. The Upload PPAP Status page displays the list of document types required for PPAP.
4. Click the icon in the Upload column against each document type to upload the relevant document.
5. In the Supplier Comments column, enter comments for the buyer, if required, for each document. Ensure that the Comment toggle button is enabled.
Once the documents are uploaded and comments are entered, these are available to the buyer for review.
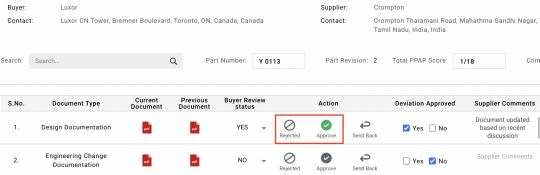
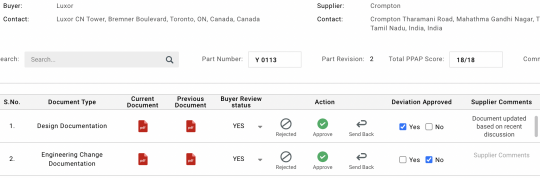
Buyer taking action on the submitted documents
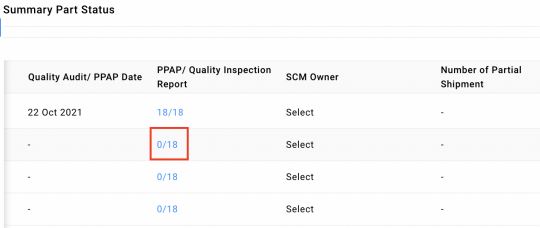
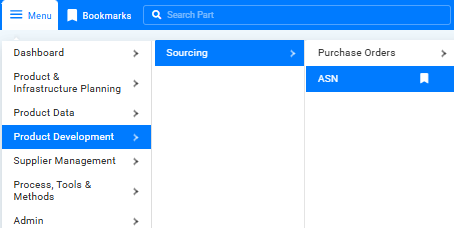
1. Go to Menu > Product Development > Sourcing > Summary Parts Status.
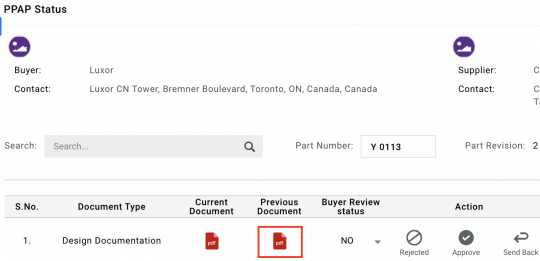
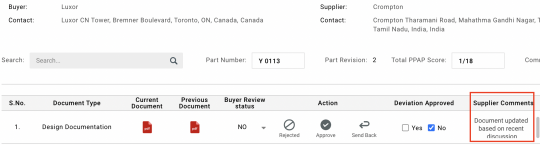
2. Go to the row for the relevant part and click the link in the PPAP/Quality Inspection Report column. The PPAP Status page displays the list of documents submitted by the supplier.
3. For each document, take the required action:
○ Click the Thumbnail icon to preview the document. In the preview pane, click the Download icon to download the document.
○ Review the comments from the supplier.
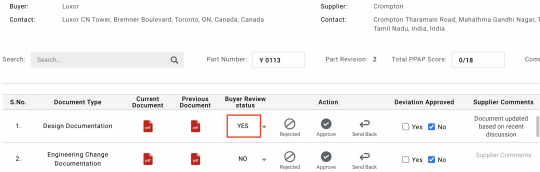
○ Select Yes in the Buyer Review status dropdown list to confirm that you have reviewed the document.
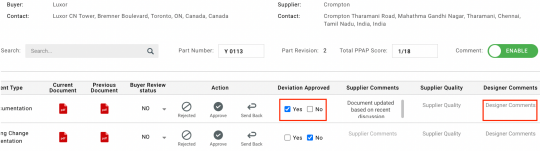
○ As deviations are consulted with the design team, the designer’s comments are recorded in the Designer Comments column. Select Yes or No based on whether the deviation is approved or not.
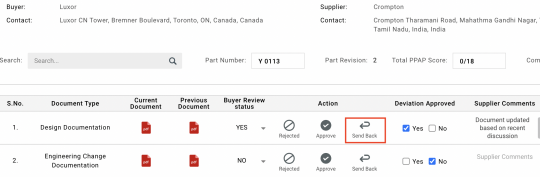
○ If you want to send back the document to the supplier for rework, enter the reason in the Designer Comments or Supplier Quality column based on whether the reason is from a design or quality perspective and click Send Back. The supplier can view the comments, rework the document and upload the revised document.
○ Based on whether you want to reject or approve a document, click Reject or Approve.
The PPAP process is considered complete when all necessary documents are approved.
Video reference: 20. Production Part Approval Process
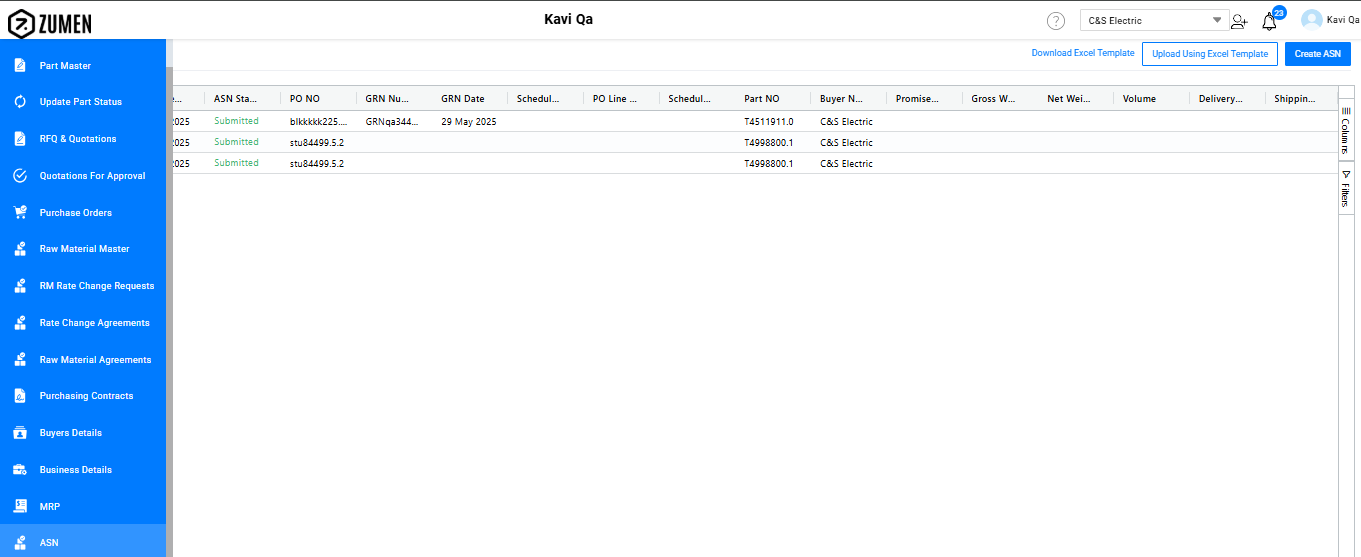
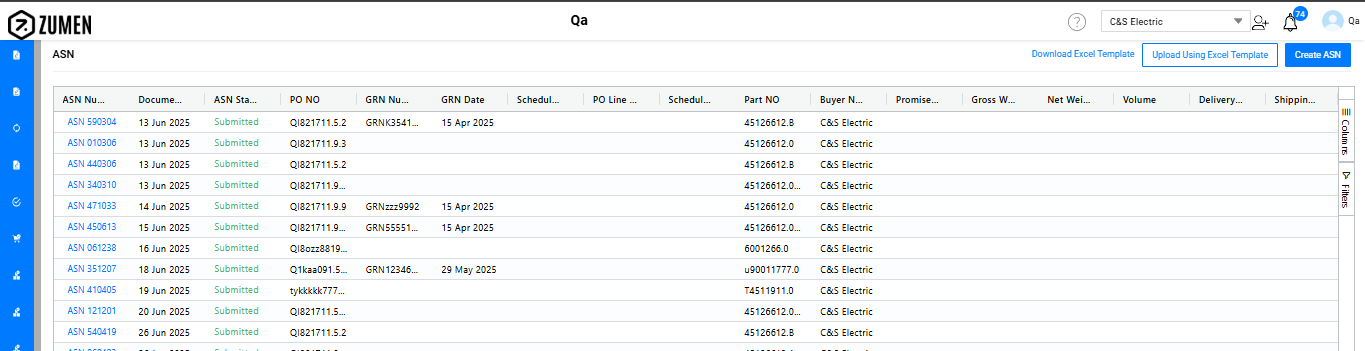
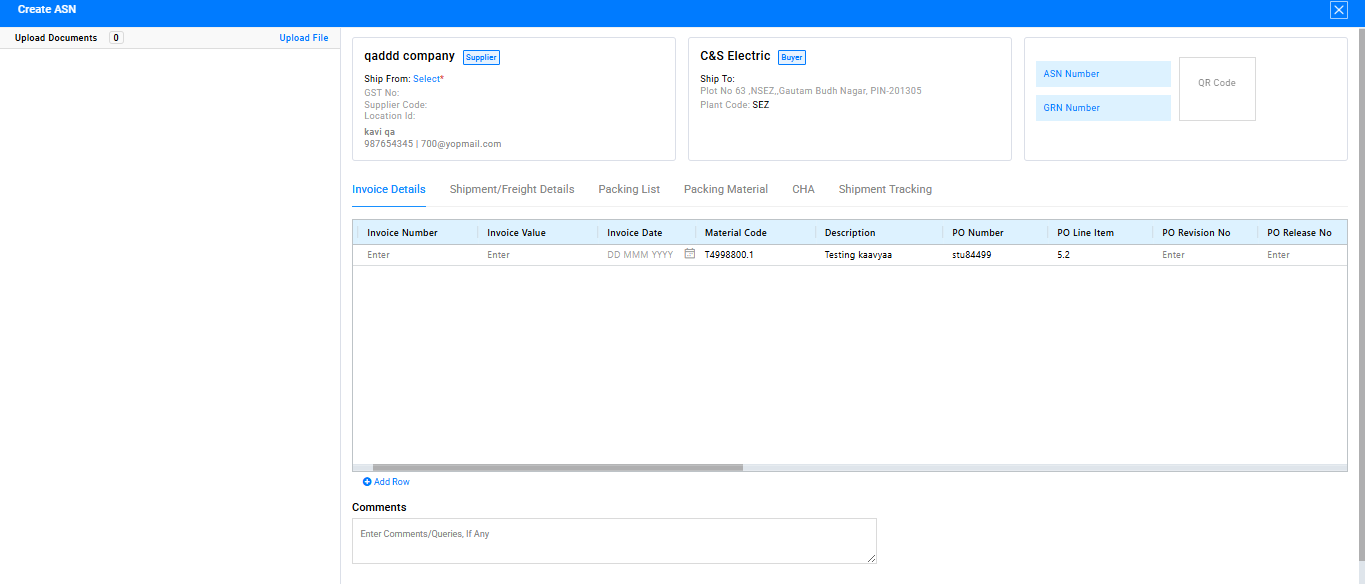
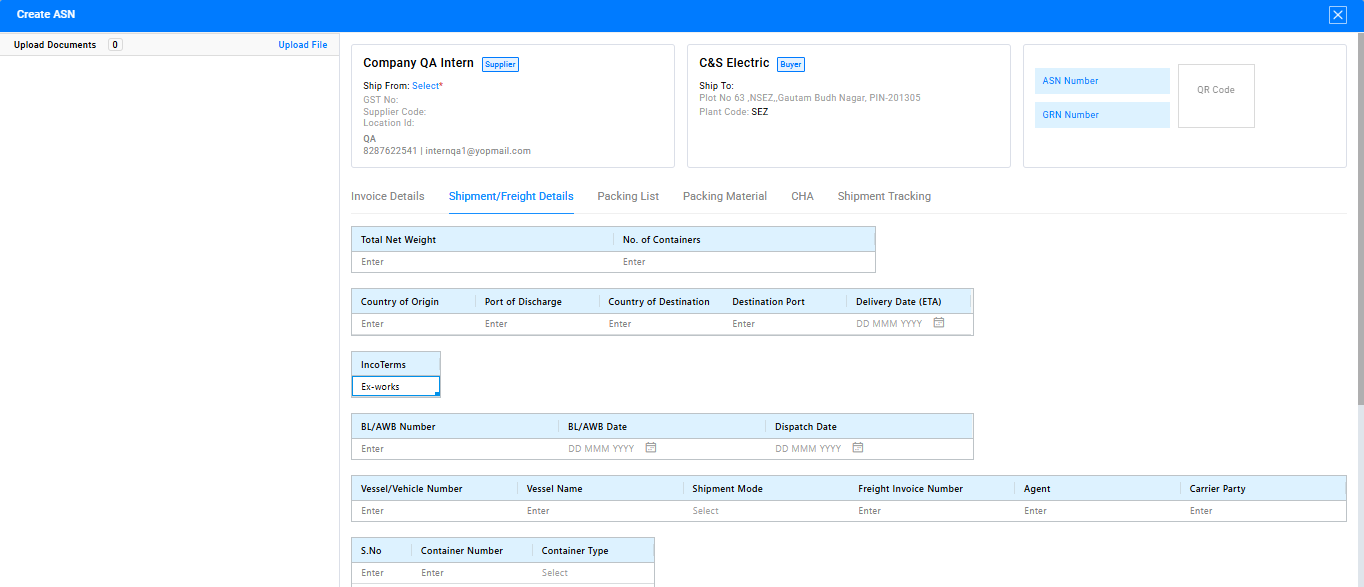
Creating ASN for Domestic Supplier Using Supplier view :
.
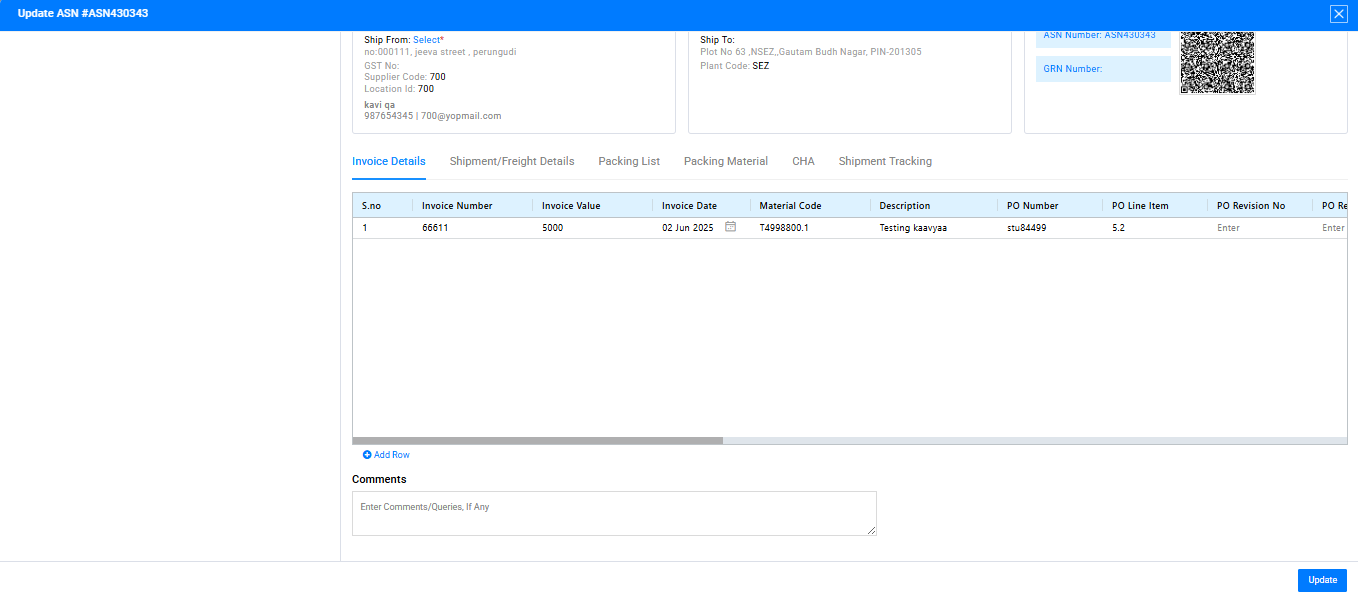
ASN Updation
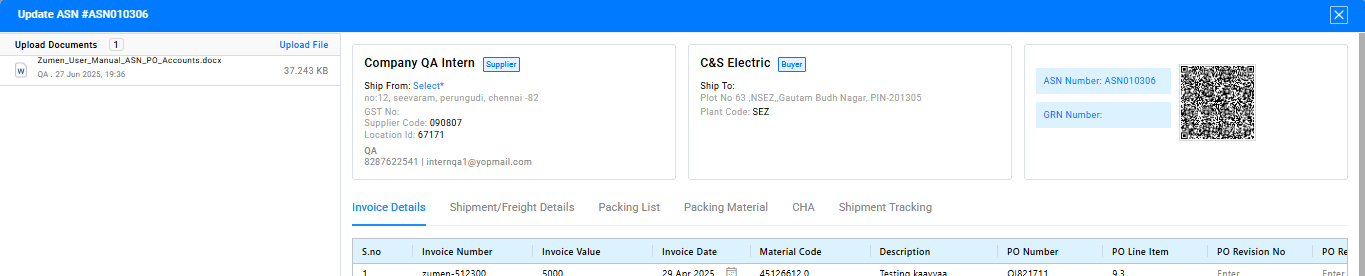
Upload Documents - supplier View
FOB Allocation
An ASN Number will be generated, and a QR Code will be created.
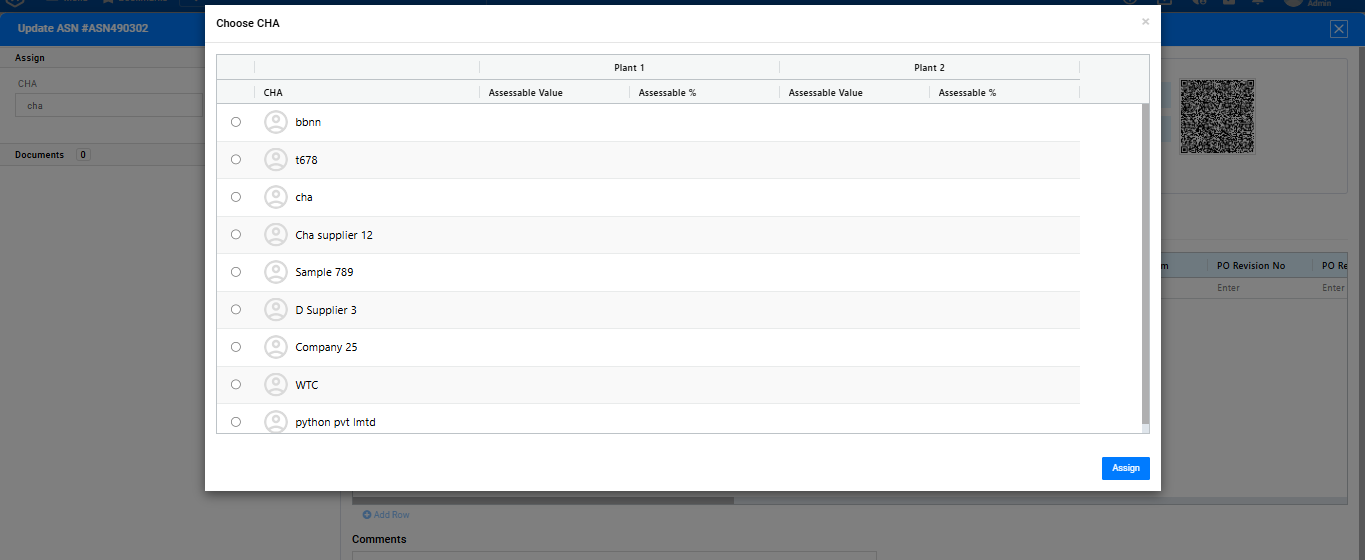
Cha Allocation
Ex-works
Ex-works Allocation
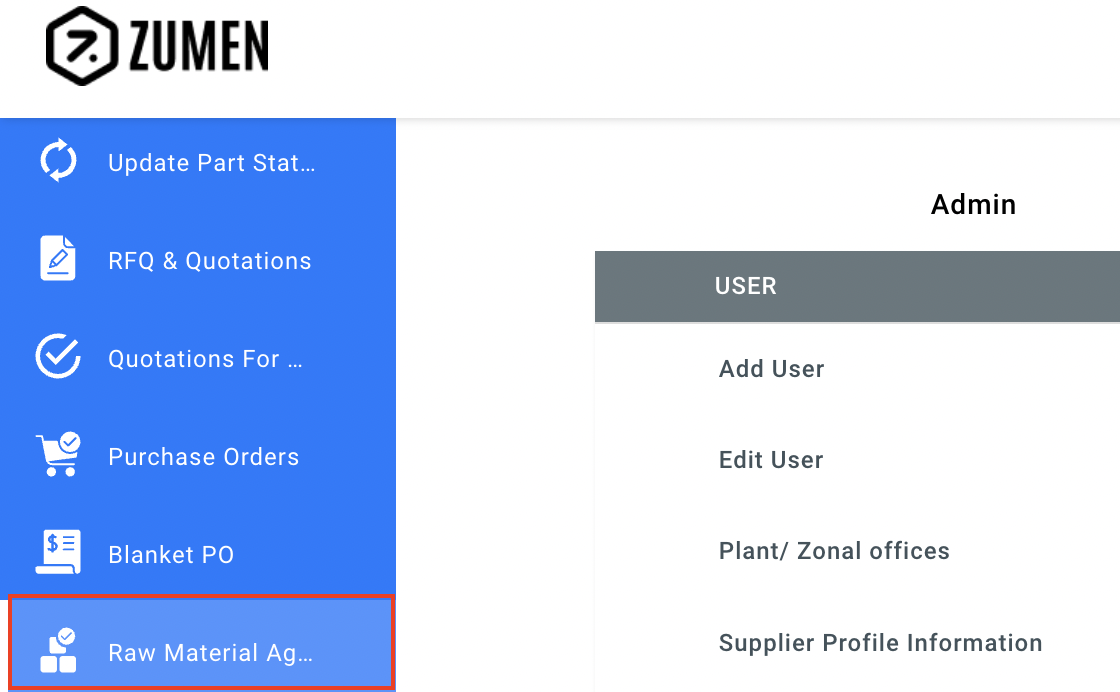
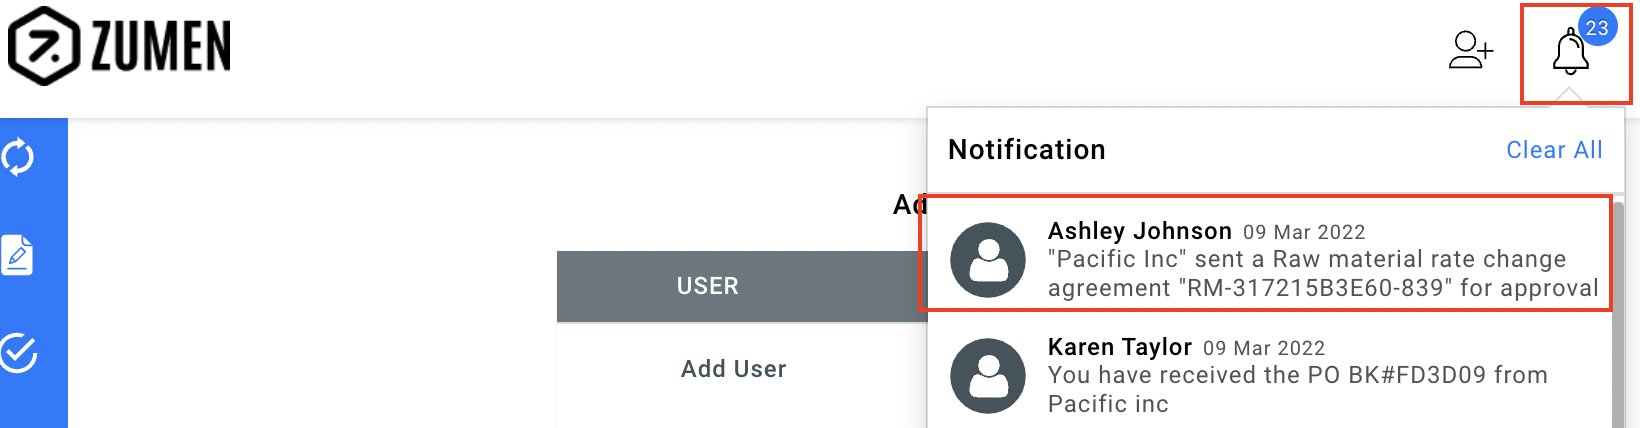
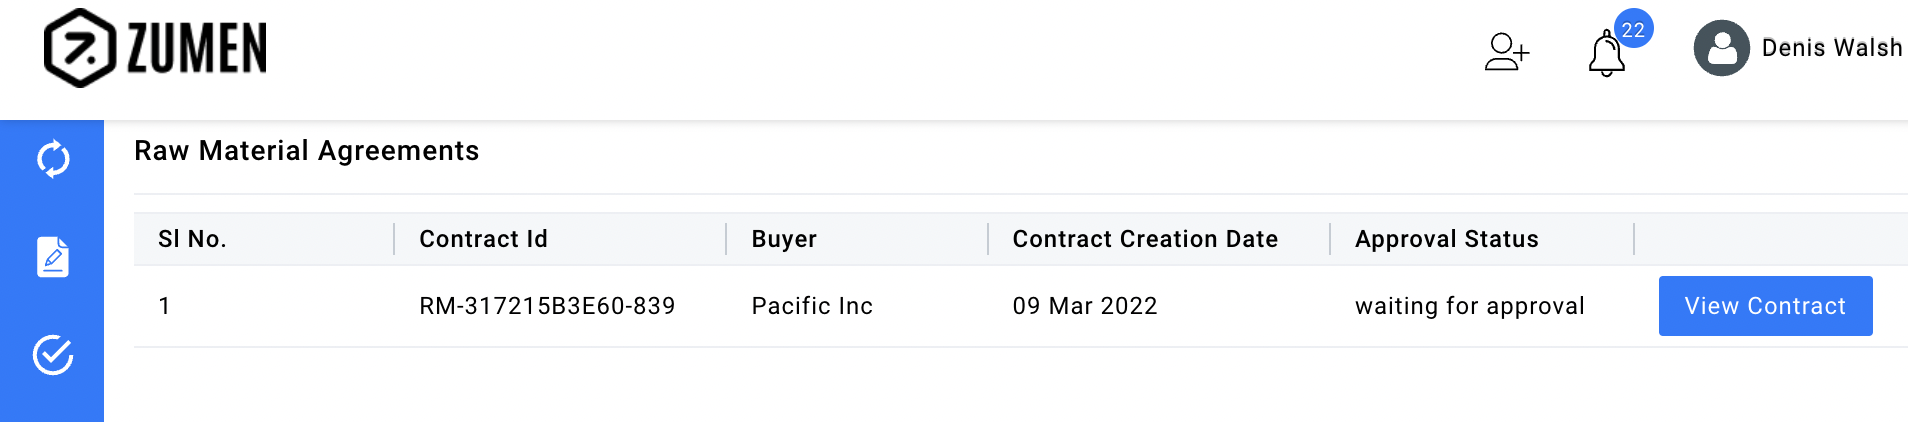
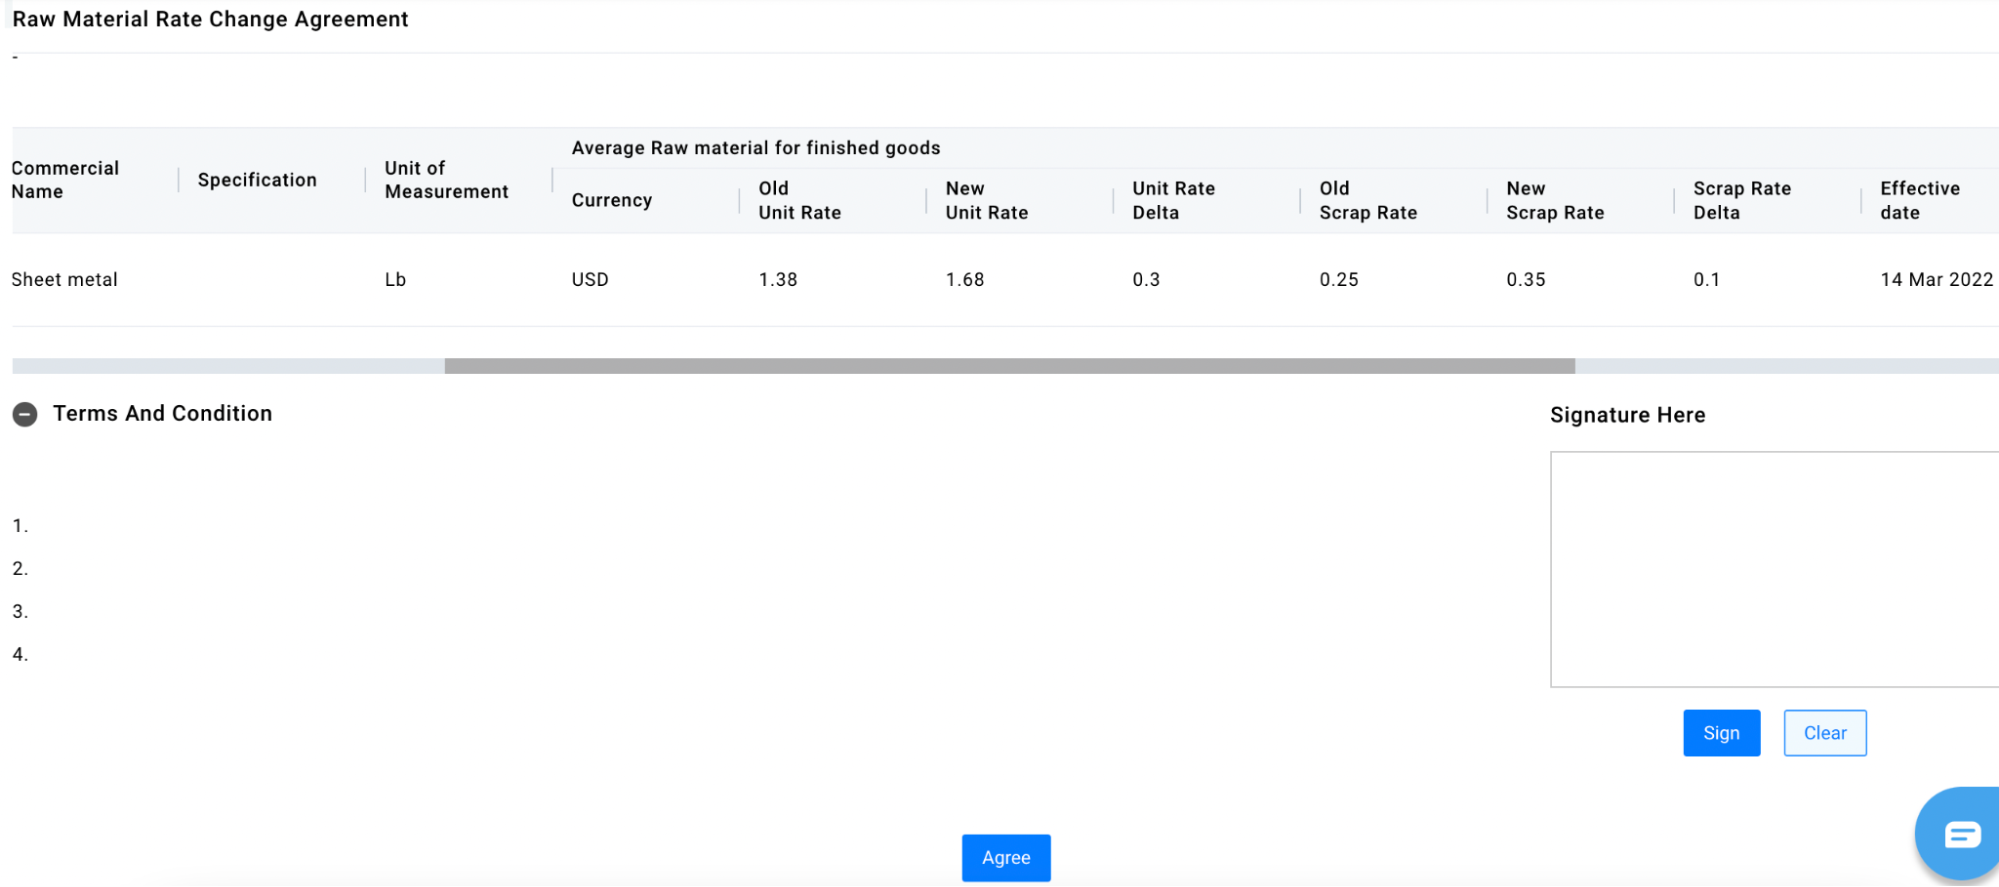
Here are the instructions for a supplier to accept a revised rate:
Any blanket releases issued after this will calculate the unit price based on the revised raw material rate. If you don’t accept the revised rate, blanket releases will continue with the previously agreed rate.
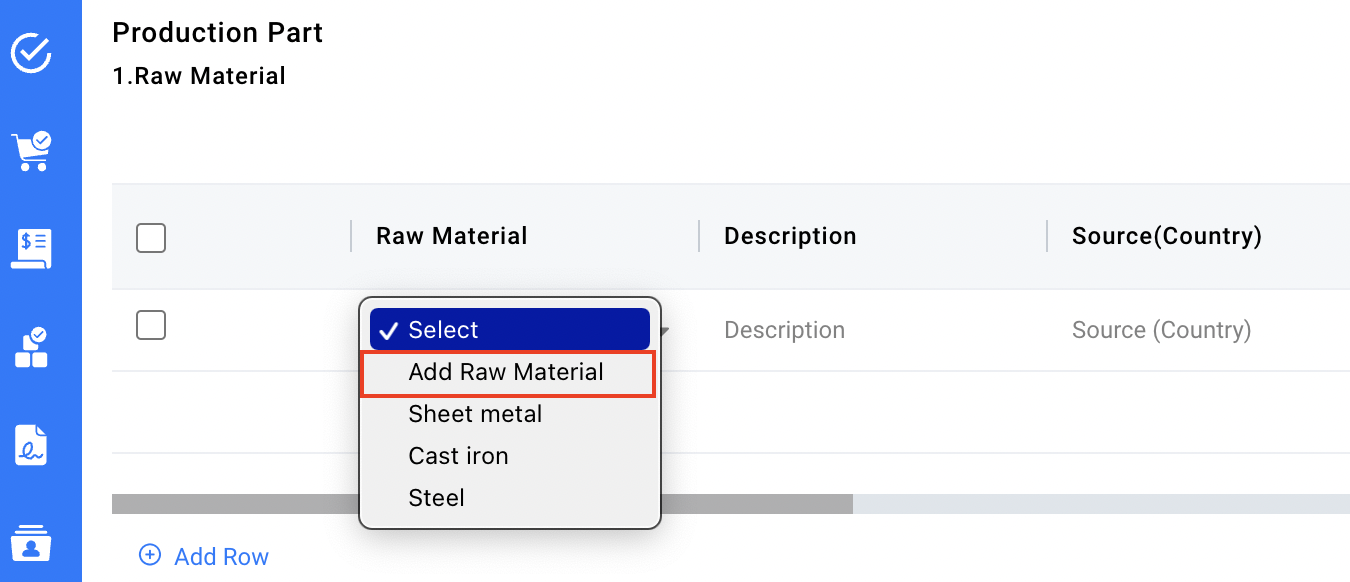
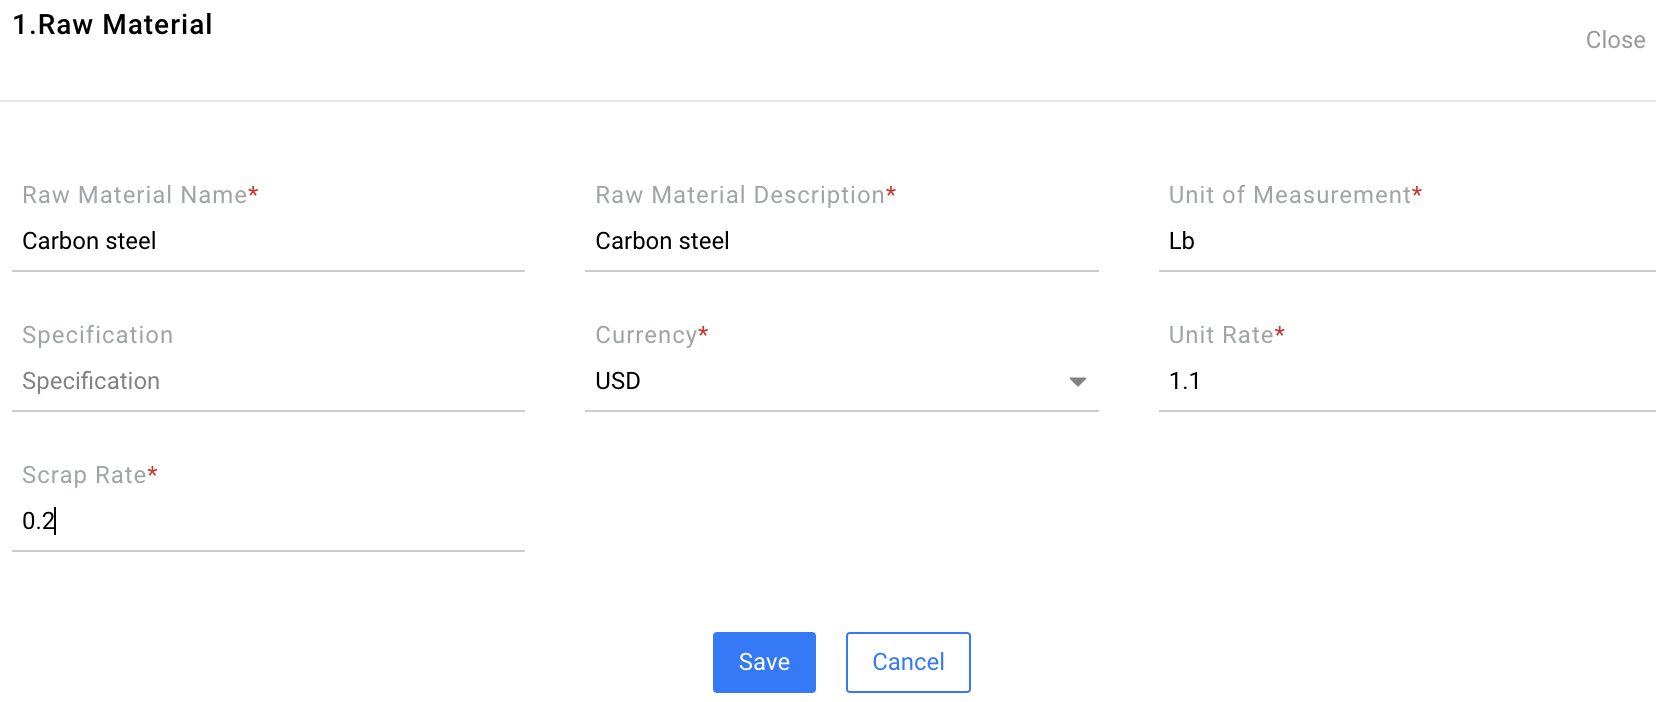
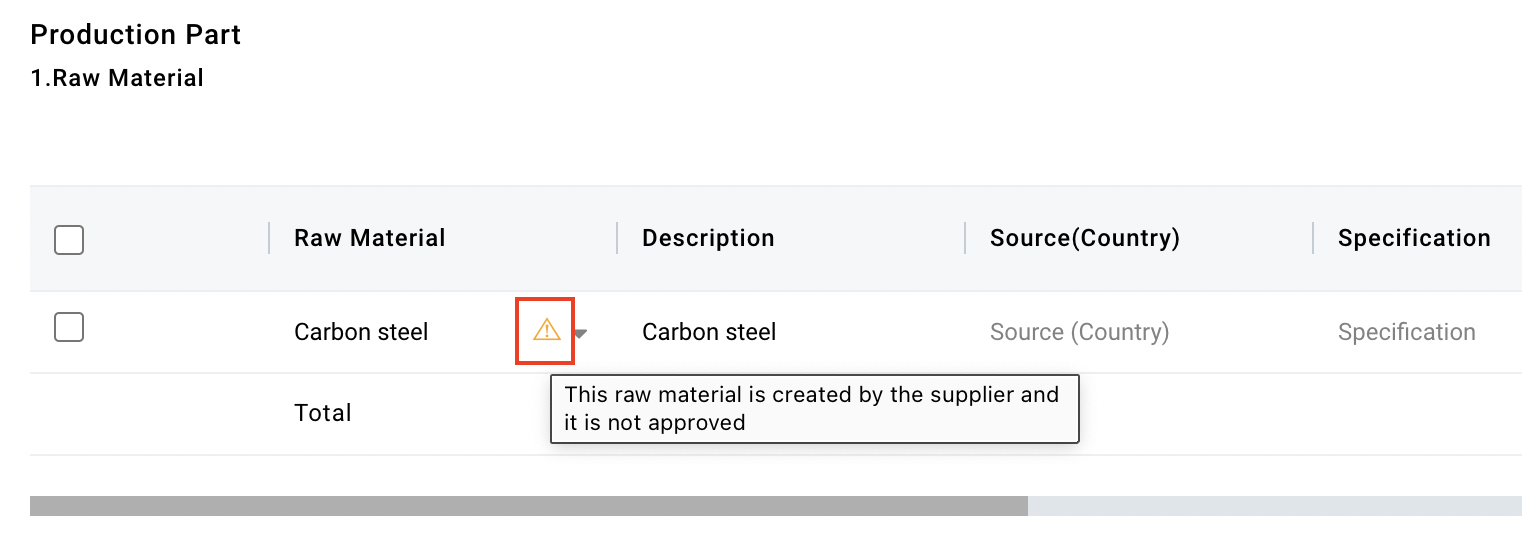
The supplier may include a new raw material when submitting a quotation:
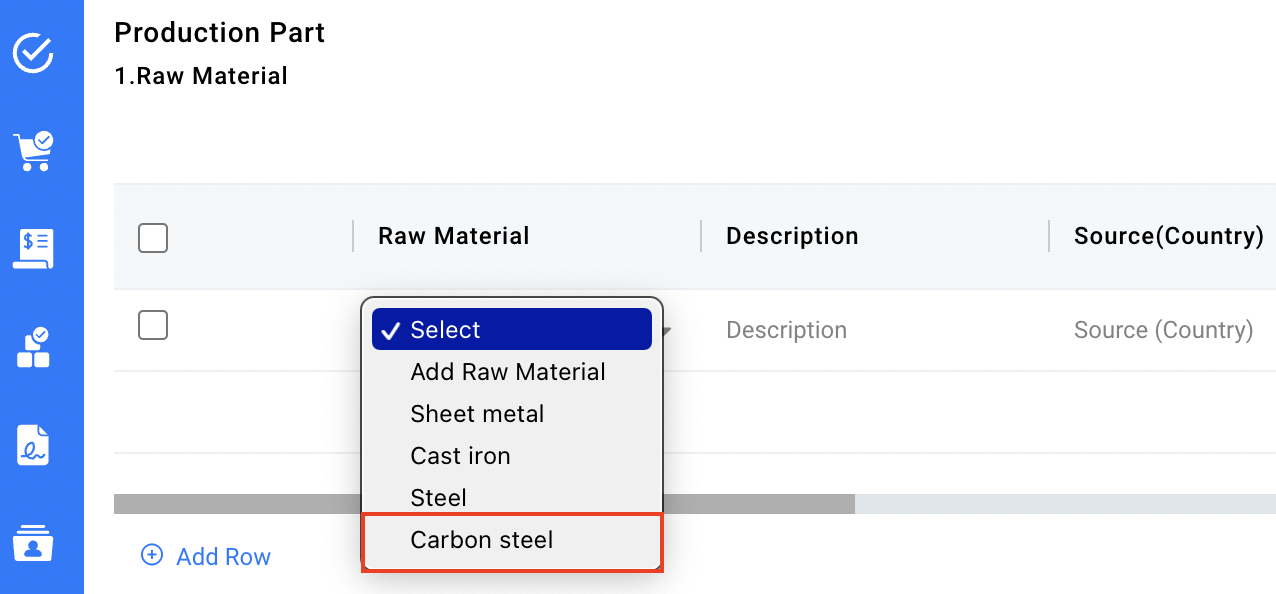
If supplier submits a quotation using an approved raw material but entering a rate different from the approved rate, the raw material record on the buyer side (Menu > Product Development > Sourcing > Raw Material > Create Raw Material) is updated with the new raw material rate for the supplier.
Going forward, this rate displays as the default rate for the raw material in the quotation for the supplier.
This guide will help a supplier take the required actions involved with raw material rates:
The supplier may include a new raw material when submitting a quotation:
If supplier submits a quotation using an approved raw material but entering a rate different from the approved rate, the raw material record on the buyer side (Menu > Product Development > Sourcing > Raw Material > Create Raw Material) is updated with the new raw material rate for the supplier.
Going forward, this rate displays as the default rate for the raw material in the quotation for the supplier.